

darcshadow
-
Content Count
3,100 -
Joined
-
Last visited
-
Days Won
216
Posts posted by darcshadow
-
-
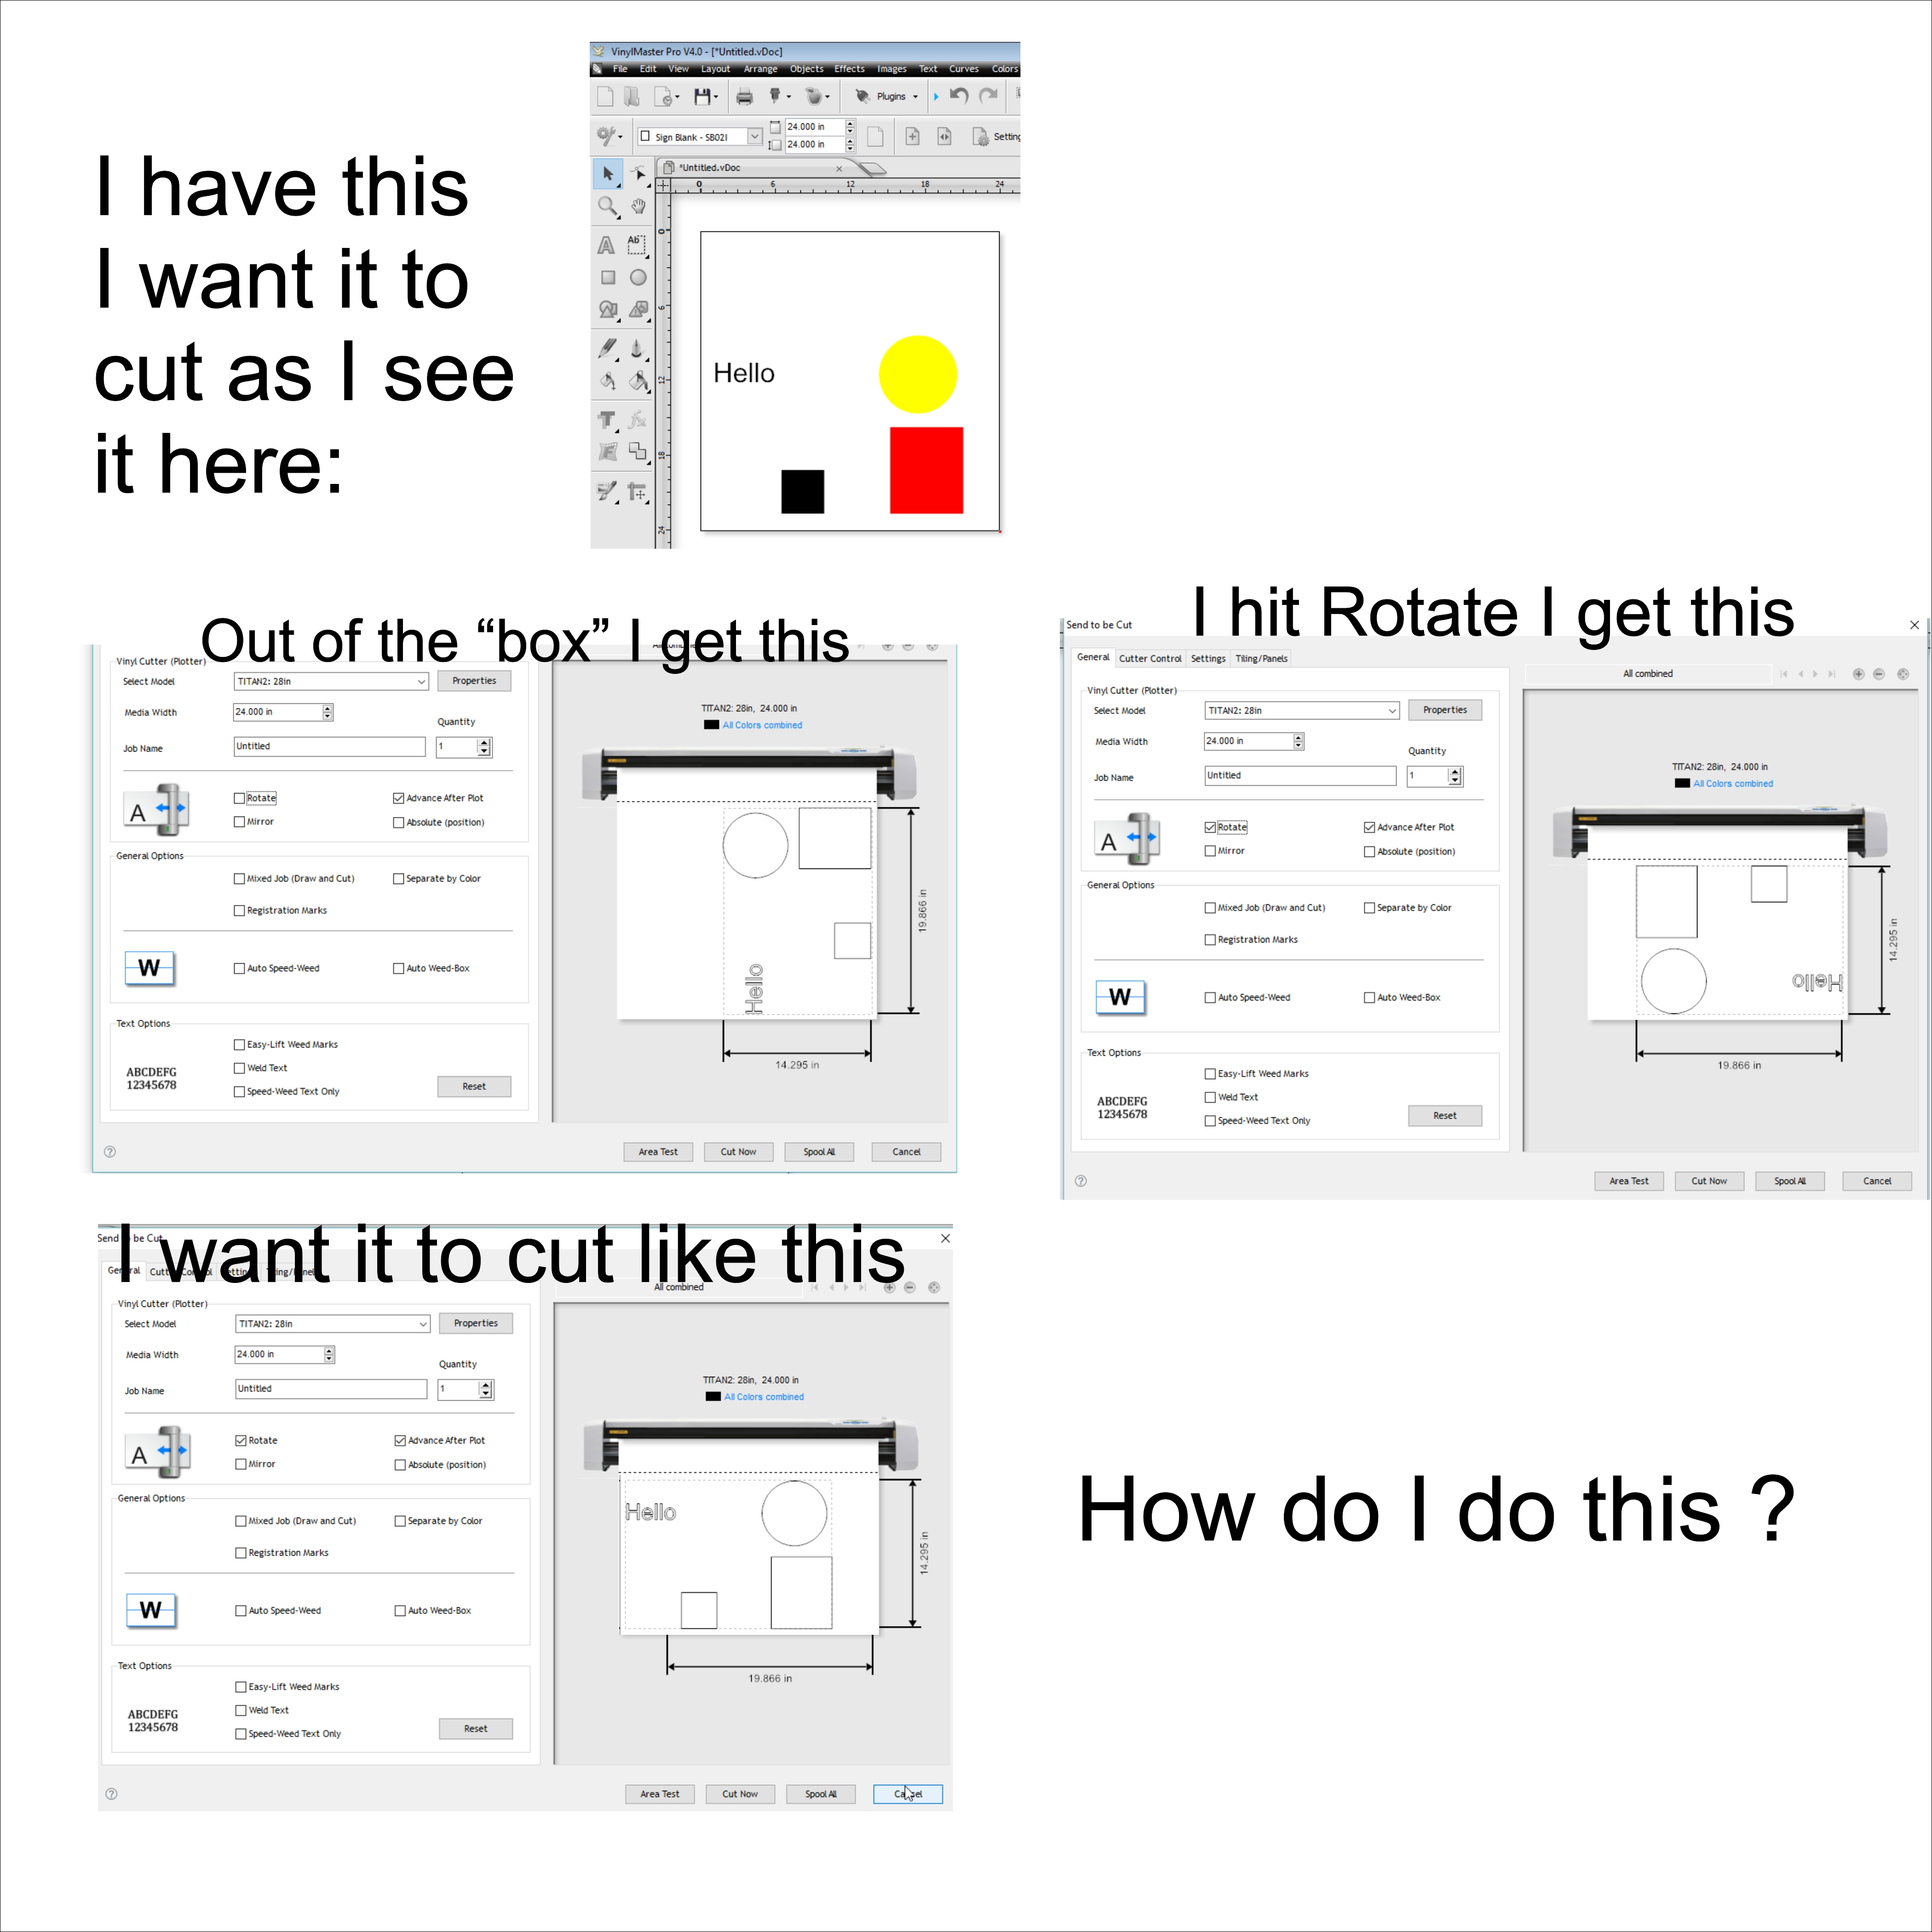
On 9/24/2016 at 9:10 PM, busterbay said:This is EXACTLY what I have been complaining about, I put in a ticket also and it still has not been addressed I was told I would get an answer over a week ago.
I am attaching an image of what it does.
Plain and simple when we hit cut we should get the same thing we see on our screen and we do not.
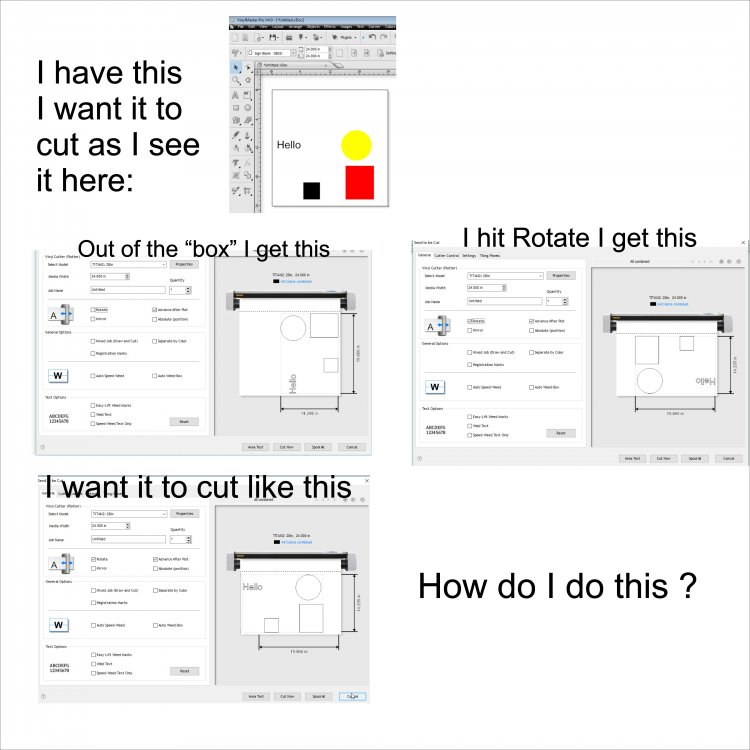
Till they make the software change, you just need to change your thinking in the way you look at the image. In your design space, the left edge is the bottom. Rotate your design in your design space with that in mind and it will come out on the plotter they way you want. Or change the way you think of top and bottom on the cutter. Personally I think the cutter preview image shown should be rotated to the right 90 degrees. The height of your design space would then be the width of the vinyl and the width of your design space would be the length of vinyl.
-
If it was just copyright infringement, they might be able to get away with it, but it's trademark infringement which is taken quite a bit more serious.
-
 1
1
-
-
Trademarks are a big deal. If the company doesn't protect them, they can actually be lost. And in the case I 100% agree with HD. HD was the first thing that comes to mind when you see that logo from a distance.
-
2
-
-
That's pretty cool. Wonder if it works as well as it seems to in the video.
-
What till Jet board 2.0. ha
This guy, that the guy with the jet wing suit need to get together and combine the two.
-
This was just way too cool not to share.
-
1
-
-
As a work around, you might try opening the file in another program that can save the file off as an eps or something VM can use. Inkscape is free and should be able to do this.
-
1
-
-
7 hours ago, slice&dice said:the polyline function makes filled-in shapes (you have to close the path, not just draw straight lines from point A-to-B, since you need to create node "C" to join back with point A).
Actually, no, you don't have to close the loop with the polyline.
-
2
-
-
On 9/12/2016 at 10:23 AM, andygeekboy said:Thanks Darc,
Could you elaborate?
i have the wire coming from the base of the cutter to the stand, I'm assuming you're talking about something different?
thanks
Ok, I miss interpreted your original post, that should be good. If you have access to an Ohm meter or DMM it'd still be a good idea to take a measurement just to verify the path to ground, but a wire from bare metal on the stand to bare metal on the cutter should be good. Three reasons that come to mind that this would be working would be the cutter chassis is not grounded (it should be but stranger things have happened), the power cord has a bad ground wire, or the ground of the building is faulty. All 3 are pretty remote possibilities, but I've seen stranger. Lived in a house for a short time where the ground was not ground and actually had 120V on it.
-
1
-
-
If it is static, which it kind of sounds like, double check your grounding of the stand. If you have access to an Ohm meter, or a DMM, check the resistance from the rollers on the stand to the ground pin on the cutter's plug. Ideally it should be in the milliohm range, but anything under a few ohms should be good. Removing the paint as you mentioned should work, but a better, more secure method would be to attach a wire to the stand and a ground on the cutter.
-
2
-
-
You know your hardware cost, double that then add in your time. How long will it take you to make it and what do you consider your time worth?
-
Font finding tools don't handle script very well. If you edit the image to break out each individual letter font finding tools will work a little better.
-
kind of how I look at it, decals to adults, stickers to kids.
-
5 hours ago, rocky53204 said:Dusted off an old DOS manual to enable mode setting in autoexec.bat. (sets com1 attributes: MODE COM1: 9600,N,8,1,P)
just curious, why DOS? You can set those attributes through the Windows Control Panel, Device Manager.
-
Photoshop is a raster image program, the cut line you want needs to be a vector line. I don't work with printing so someone else will have to ring in telling you the best way to do this.
-
2
-
-
Sure, anything is possible.
-
Most likely the socket on the computer. My wife had the same sort of problem. Took it to a local show and they replaced the jack in the computer. Cost was about $100 I think, although the part was only $5 or $10.
-
Haven't played with 10 much yet, but in older windows you could go to your device manager window, ports, and right click on the port in question. Choose properties, port settings, Advanced, and from there you could change the port number. Not sure this will fix your problem but it can't hurt any.
-
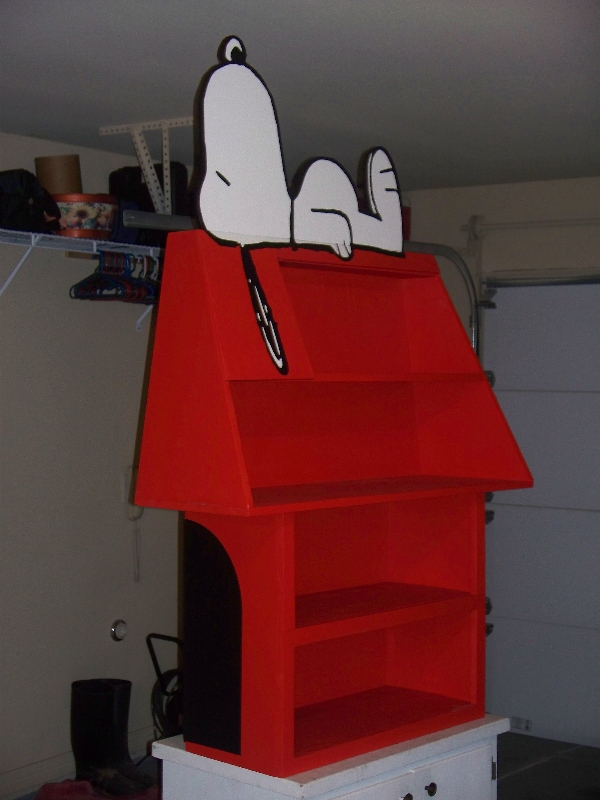
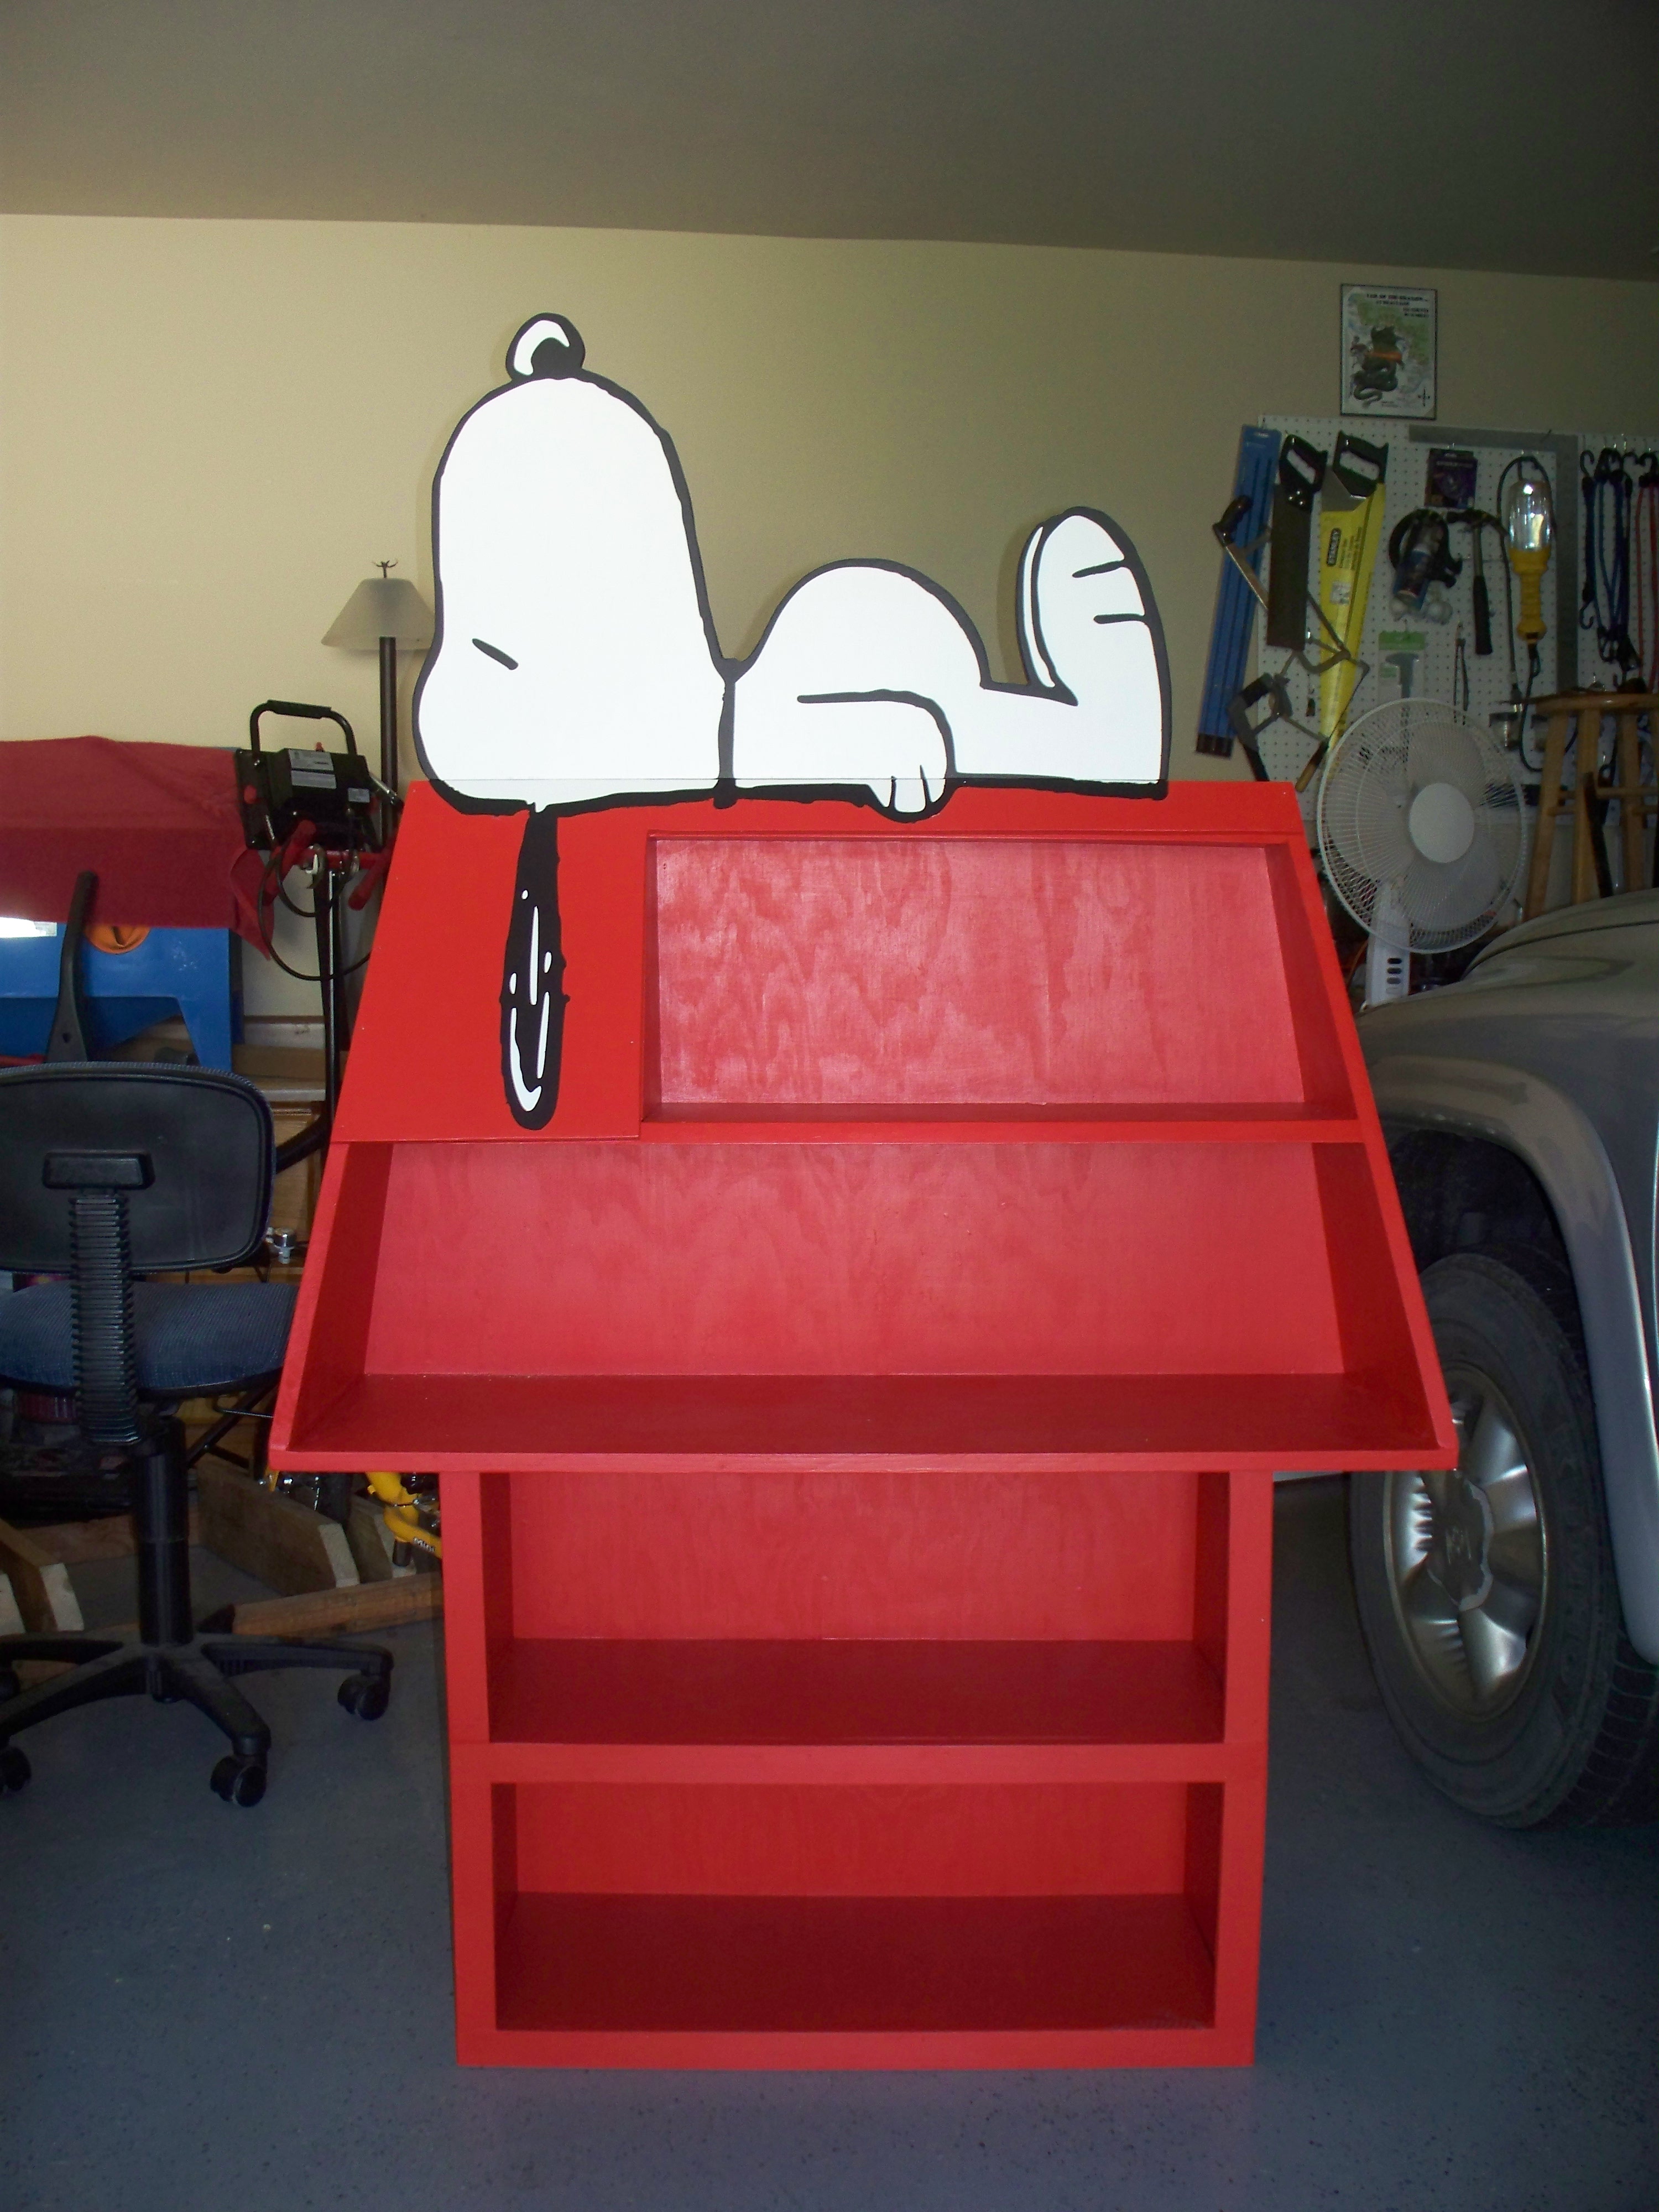
Thanks, it was a fun little project, made so much easier with the vinyl templates. Here's another shot showing the "front" with the door.

-
2
-
-
Sister-in-law is a huge Snoopy fan and asked if I'd make her a bookshelf that looked like his dog house. Went a step further and used the vinyl cutter to create stencils to cut out a Snoopy and then paint him.
I'm really pleased with how it turned out and know she is going to love it.

-
10
-
-
For something that detailed you'll want a much slower speed and double check your blade. Do a search on here, there are dozens of threads that contain instructions on the correct way to set blade depth.
Also keep in mind, even with everything set correctly, that fine of detail on a MH is going to be tricky and you'll likely never get it 100% perfect.
-
1
-
-
For a red truck I'd suggest white, silver, or grey. Black on red sounds good, but it's not easy to read from a distance unless you have pretty large letters, even then, a white outline would make it pop a lot more.
Something else to keep in mind would be color blindness. Red/Green is a common one so you wouldn't want to use Green on your red truck, aside from that color combo being hard to read in general, there would be some people that wouldn't be able to see it at all.
-
3
-
-
Saw a photo the other day of an RTIC cup with an Ozark trail bottom, further proof that they are made in the same factory.
-
1
-
-
This was my first one, start to finish including setup and cleanup, probably about 2 hours. Could get it down to maybe 45min per if doing the same design and color on several cups.
Need help...
in General Help
Posted
Just a shot in the dark. Does your MH have the dual holder, one for a pin and one for a blade? If so, are you using the correct position for the blade? Don't know why it would work with one type of vinyl and not the other though.