

randalle
-
Content Count
282 -
Joined
-
Last visited
Posts posted by randalle
-
-
A couple jobs I have recently done.
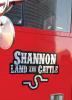
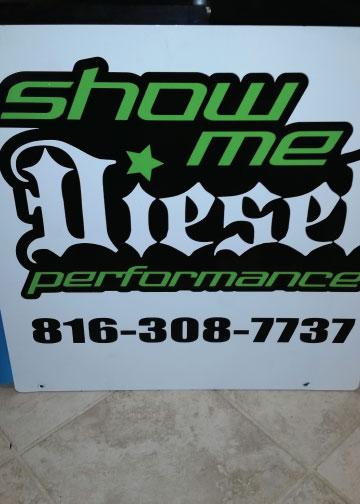
751 on max metal. 2'x2'. Did this logo for the customer and they liked it so much we are doing shirts for them now too.

PolyChrome by creative films (courtesy of USCutter.com) on 751. I really like working with this, however if you have an orange peel paint job.... you got an orange peel decal job. : /
-
 4
4
-
-
Looks great!!
-
1
-
-
No, never tried that. lol, I'm deep enough into CM3 now that if i did, if you can, it'd just confuse me. If you make a few cuts, say give CM3 a morning or afternoon of getting used to it you'll be completely at home with it.
-
1
-
-
There was window film in that video? Where??
-
1
-
-
Honestly, I tried CM3 one time and never switched back (to whatever I used to use). I have used CM3 for over a year now with zero problems. It's too easy to quickly change blade pressure, speed, and flip X / Y.
A handy trick... If you highlight something in you image, like say the SDST letters and then go hit 'send to cm3'... it will send only the highlighted path(s). Super cool. You may not use that while you get used to CM3, but remember I told you about it. Eventually, You will. And you'll love it! (this is so you don't send the full image to the CM3 and then have to go sort out which colors you want it to cut)
-
1
-
-
Congrats! I use graphtec's cutting master 3 software with mine. Do you use Illustrator? If so, there is a plugin for Illy that spits jobs straight out to CM3 that is pretty friggin fantastic.
-
3
-
-
Must have that lamp! Love it!
I have a T-square, and that lamp would give me back a minute per shirt (or so). It would pay for itself quick enough.
-
1
-
-
Thank you!!
-
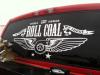
Trying to figure out what the "Roll Coal" font is. please and thank you!
-
I did a dumptruck yesterday with chrome I bought from USC and it worked like a champ. (creative films prime)
-
You'll get it. Just make sure you have a big squeegee of some variety and go slow. My biggest problem is getting too geeked out when I do something new and rush through it.
Coro is cheap make a few practice ones and you'll have it down. Slow and steady wins the race.
-
here is a video that I watched to figure out my process -
Note: You do not need the big squeegee pictured here. If you have one, or have the money to buy it... fine. If not, you can make one with a board and some velcro. (the soft part not the scratchy part)
-
I have never done coro wet. I don't think I would even consider it for letters. Now if I were doing a giant square or something solid like that,,, I might be tempted.
here is how I do it and I have excellent results:
1. position my graphic on the sign right where I want it.
2. I fold the backing paper down 1" along one of the edges exposing the transfer tape (opposite of the direction of the fluting so that I can squeegee with the fluting)
2a. at this point your transfer tape should be holding your vinyl in place on the coro via that 1" edge you just made.
3. I put my big squeegee on the end that I rolled the tape back on and slowly push down the vinyl transfering it onto the coro.
3a. I reach around the side for the first couple of inches that I'm pushing the squeegee and make sure that the backing paper is sliding off (out) properly. Once it goes a few inches, I center myself on the squeegee and push to the end.
Most important thing I can think of with this approach is to have something at the other end of your coro to keep it from sliding away while you squeegee it on. I have had very, very good results with this method.
edit: I use 4075 RLA paper tape for coro applications. And didn't know about the dryer sheet trick, so I haven't tried that yet.
-
1
-
-
lol, there you go! I've only done single color backlit signs. : )
Now I will know to bid those double color ones higher!
-
I send everyone that asks me for them to vistaprint.
-
Object - Path - Offset Path
-
grab a cup of coffee, or 4, and read the 'fair use' article on wikipedia. Good food for thought.
and to answer your question, the way I explain it to my customers is the company owns the trademark and it's likeness. So, changing the trademarked image around isn't fooling anyone. It's still a blatant rip off, even "the border is different!" or whatever.
In your case, regarding making yourself a monster logo... if you have read that fair use article... you will have the answer. : )
-
I always overlay. I'm sure there is a valid reason not too in some specific scenario.... but I haven't ran across it yet. My OCD would destroy me if i left any form of a gap from trying to 'punch'.
-
2
-
-
I get jpss by the roll from Coastal. Great company, fast shipping.
http://www.coastalbusiness.com/jetprosofstretchinkjettransferpaperroll-13x100roll.aspx
-
Super close to Portcullion Bold.
-
1
-
-
Awesome!
-
I like it, nice simple design. I've been wanting to build a light table, I already have a 24" x 24" x 1/4" piece of plexi so I'm set there. I like this idea of this solution as I can break it down for storage if I won't need it for a while. I'm not sure of the 45 degree tilt though as seem like you will always have to work against gravity but I'll give it a try.Gravity is your friend! lol, seriously though give it a shot. I hated layering on a flat surface, backlit or not. I felt like I had more "surprises" when working on the flat surface. On the other end of the spectrum, working on a window didn't have as many surprises (sections of vinyl that don't cooperate)... but the straight vertical approach was just too harsh and gravity would in fact get me from time to time. With the 45 degree setup, You get the best of both worlds IMHO.
-
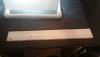
and here is my coveted $2 big squeegee. : )
-
1
-
-
Here is my homemade layering station.
1" pvc is super cheap. I bought a bunch of it, including T's and elbows when I was working on my own tape stand / roller - which I have now disassembled and re-used all of that for other purposes. I built a $2 big squeegee out of a piece of trim with felt on the edge and that has replaced all of my app tape roller needs.
---
I have <$10 in pvc in this rig.
The lights are around $9 at the big box stores.
For bulbs, I put the Natural Daylight CFL bulbs in them rated at 23w / 1600 lumens. So, say another $15 - but I have these bulbs all over my office. You can't beat a 23w / 1600 lumen natural daylight bulb. I have them in my weeding lamp and they are spectacular for the $.
Lastly, and this is the gotcha.... I have a 1/4" sheet of plexi for the top working surface (24" x 36"). This chunk is spendy. You'll need to shop around and find a deal on something like it. Retail on a piece like that can get spendy, fast. I'd check your local glass shops and beg for some scratch'n dents. I DO NOT recommend anything thinner. This plexi is thick enough to take pressure. It will bow when I really push on it, but it is more than sturdy enough to do the job.
Here is the side view:
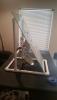
Here is the front view:
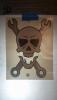
I taped plain white paper to the back side of the plexi to act as a diffuser. You can't stare into those bulbs for long!
I use blue painters tape for any vinyl project that requires tape. Just a preference of mine. It sticks well, and comes off super easy too.
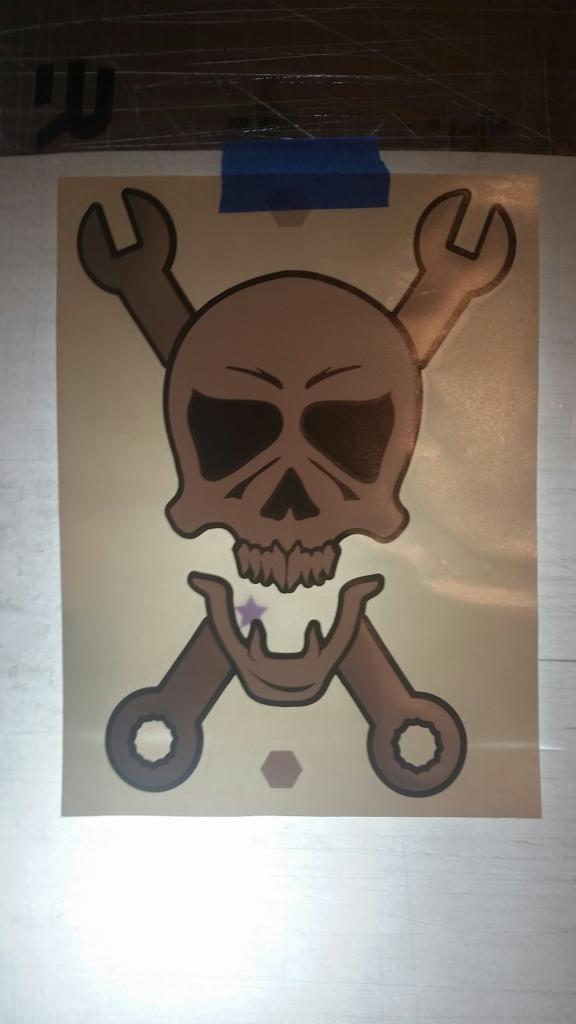
In the front view, the 'star' inside the mouth of the skull is actually a piece of vinyl that is stuck on the plexi. This gives you an idea of how well you can see through to your bottom layers.
I very much like the work angle of this rig. It's about 45 degrees. In a pinch, I have used a window before (a lot actually)... but the angle of this just crushes the window in ease of use and predictability.
Excluding the plexi, I have < $50 in this setup and it is a game changer for me and layering vinyl. I shopped for a real light table for months and couldn't drop that kind of $$$ so I actually built a light table out of scraps from the shop, but eventually tossed it and built this setup as that 45 degree angle is so sweet to layer with.
edit: The pvc isn't glued together at all. I just tamped it together and threw it on the table. I won't glue it because I can reconfigure it if needed. The plexi is not attached at all. The two elbows on the front act as a stop for it. Been using this for 2-3 years and never had the glass come off unless I wanted it to, so no reason to attach it. In fact, 90% of the time I'm not using this, I have it broken down and stuck somewhere out of the way.
-
5
-


Drinking with a buddy we made a.. (T-Shirt)
in Show your work
Posted
That's awesome! I haven't done any etched stuff yet but I'd like to try it out.