

restless-rooster
-
Content Count
77 -
Joined
-
Last visited
-
Days Won
1
Posts posted by restless-rooster
-
-
4 minutes ago, Dakotagrafx said:what skeeter said, I had 3 roland print/cut and you blade exposure is out 10 times too far.
word of advice - keep on your weekly maintenance and keep it printing - solvent printers do not like to sit and the head alone on the bn-20n is around $2000 - not individual like the sp-300i which is only $750 per head. always keep extra ink on hand so it never runs out and let it do it's daily cleanings.I’m going to give that a shot right now.
I’m going to order some extra ink right now just to have some on hand, good idea. Thanks for the tips, I will keep on the maintenance for sure. -
14 minutes ago, MZ SKEETER said:First off, you have too much blade exposed out of the blade holder. . You do not use a credit card or post it notes to adjust blade depth. These instructions have been posted hundreds of times on here. Next, you do not lift the decal from the backing paper, You squeegee the top of the transfer tape real good, then turn the decal face down. You peel the backing paper away from the decal. It makes a huge difference. Lifting the decal off of the backing will lift the backing paper right up with it.
To start with, you should set your blade depth correctly, by taking the blade holder out of the machine, and firmly cut across a piece of scrap vinyl, you will be cutting. You should only be cutting the vinyl and barely a mark on wax paper backing, Adjust blade to get there, Then put the blade holder back in machine, and use the force of the machine to get there, same results, only cutting the vinyl and barely a mark in wax paper backing. You should barely see and feel the blade out of the blade holder. Regular sign vinyl is only 2-3 mil thick. You only cut with the very tip of the blade.Awesome, I will go try it right now, thank you! Also, these probably won’t have a transfer tape on top of them, but would squeegeeing still help?
-
Hey everyone
i recently purchased a new BN-20 from USCutter. I also have purchased Orajet 3165.
When I contour cut, I can not get the sticker off of the backing paper. I can weed the sticker easily, but when I try to actually peel the sticker off, it pulls the backing paper also.
Common sense would say the Cut Force is too high right? Well I went down on Cut force 1gf at a time until it wouldn’t cut through the vinyl. So I was at 37gf cut force and it wouldn’t cut the vinyl. 38 and it would cut too much of the backing paper so I couldn’t get the sticker off.
Next, I tried to adjust my blade depth and try everything all over again. I came up with the same issue. I put a new blade in and have the same issue. My blade is out about half of a CC thickness.
I am using VersaWorks 6.
any suggestions on what I may be doing wrong?
thanks!
-
2 hours ago, Wildgoose said:Yes that's the same experience I have had. Best when used for very simple shapes. Great look though although you need to put a long dwell time on the heat or it can pull back up sometimes.
I may have to use a simplified version of my logo for the hats then! I appreciate your help. I'm going to practice a little bit more. I have some extra hats just in case.
-
 1
1
-
-
On 11/23/2018 at 10:39 PM, Wildgoose said:That looks a lot like Siser Brick. They have a few different thicknesses available although USCutter stopped carrying the 1000 micron and now just seem to have the 600. It's still a cool addition to create some extra pop.
https://www.uscutter.com/New-Siser-Brick-Heat-Transfer-Vinyl-20in-x-1-Foot
Hey
I've been really busy lately, so I just got around to trying out the brick. It is a tough cut. I'm going to try a new blade maybe. It seems to cut deep enough most places, but corners it seems to not be cut through enough.
-
1
-
-
17 hours ago, Wildgoose said:That looks a lot like Siser Brick. They have a few different thicknesses available although USCutter stopped carrying the 1000 micron and now just seem to have the 600. It's still a cool addition to create some extra pop.
https://www.uscutter.com/New-Siser-Brick-Heat-Transfer-Vinyl-20in-x-1-Foot
Thank you! That is exactly what it is.
I'll be putting my logo on a few hats this way for something different until I can save for an embroidery machine
")
thanks again!
-
1
-
-
Hey everyone
My friends company got these new hats, the logo is rubber, but its cut out like it was cut with a vinyl cutter.
Does anyone know how this is done, or what material is used?
I'll attach an imgur album with some pictures because it's kind of hard to explain.
Thanks for any help!
http://imgur.com/a/YlSglmX
-
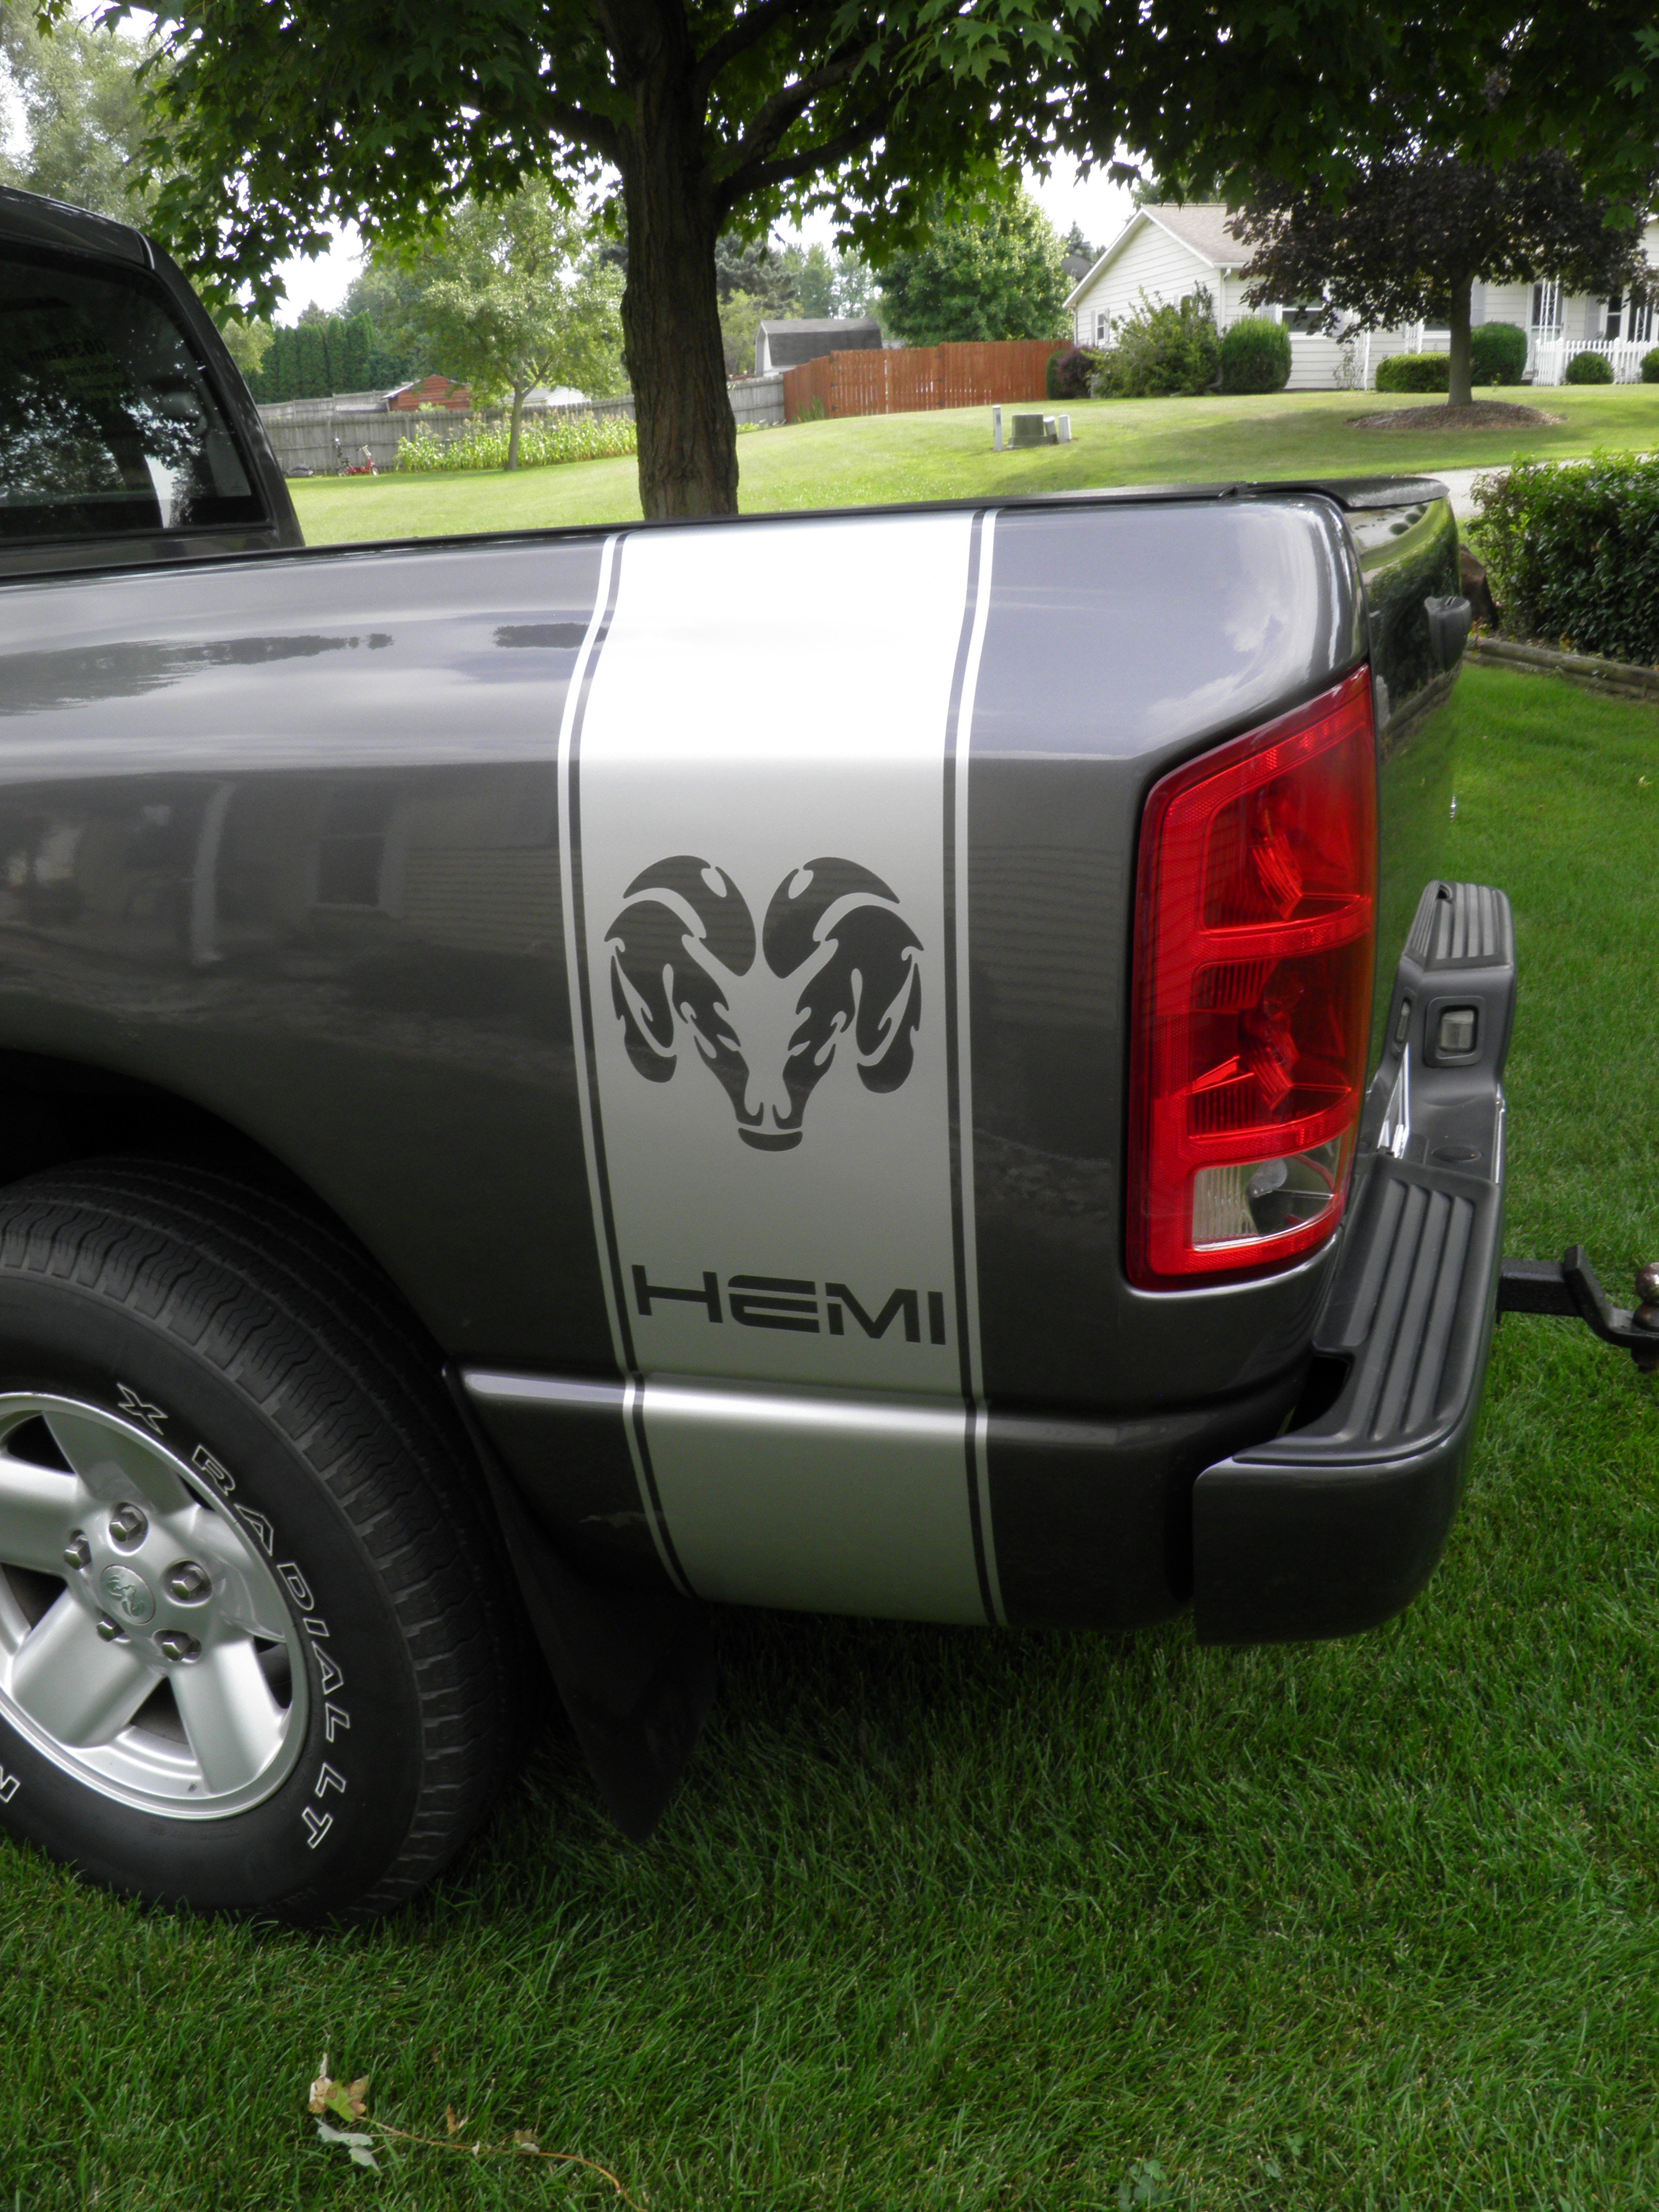
17 hours ago, jmas said:Here's what I would do. I would center the decal on the bottom of the bed like so, and adjust the size of the design accordingly. If it went to the right any more, it would be too close to the taillight, so you're limited in that direction. Any more to the left and not only will you get into the curvature of the wheel well, but it will be off center with the bottom of the bed. There's nothing that says you can't be off center down there, but it's the kind of thing I notice.
The Dodges in this thread are different. The bottom of their beds curve up under the truck and the rear of the bed bends away behind the bumper, both of which help break it up. But the bottom of the F-150 is basically a flat rectangle and the decal will fall somewhere inside that well defined box at the bottom of the bed. I'd center it, and centering would seem to keep you from having to worry about that wheel well.

Nice idea. I was thinking about going further towards the light and taking the light out and trimming it inside the hole and putting the light back, but like you said, it won't be centered in the bottom. I was also thinking about making it stop at that bottom intention so I don't have to go too low, and it won't be as obvious if it's not centered.
12 hours ago, Wildgoose said:Apply a piece of app tape to see how straight it stays and make an adjustment. You can probably draw a line on the tape after and then you will have a template,
That's true, maybe I'll try that when I have a day off, thanks for the idea!
-
So I guess I'm going to go ahead and order some 751 in the color I want. I'll wait until tomorrow to order in case any of you have suggestions on something else to use.
Depending on how long it takes to get here, I may try to install next week, and I'll keep you guys updated.
First I have to work on getting the original 4x4 sticker (I'm not calling it a decal) off.
@Dakotagrafx when I was looking for an image to use as an example, I was searching Google and a thread came up with you in it from I believe 2014, and it had your truck, so I was hoping you would reply haha.
-
1 hour ago, Dakotagrafx said: 2 things - one someone with experience doing it gave a tip but we all have to learn somehow - first time I tried this on my 2003 ram I found that there was a slight compound curve that I really hadn't noticed - the bed actually narrowed slightly behind the wheel besides the curves going up and down. first one took 3 tries wet and with heat as part of the learning curve. add that to I bought the 751 so it would contour and whimpered at each one thrown away. getting that first one straight was easier than getting to to lay right - then try to match the other side. it wasn't as easy as the video made it look. maybe your truck won't have that much of a compound curve but I have seen lots of do it yourselfers that have exactly what Mr. Joel described. but again we all have to learn by doing . . . and paying for our mistakes. That and when I posted the pics that was the first cease letter I ever got
Turns out Chrysler owns the copyright/trademark to Hemi and the Rams head even though other manufacturers have made hemi's and the tribal rams head was never used by them . .. . MIL was a state attorney at the time and said I might win but it would cost me more than my house x2 to find out. I decided to find something new

That turned out really good! So did you end up taking it off and replacing it with something else? Did you only post the picture here when you got the letter?? Luckily, the design I am doing is my own logo :), my truck is going to be " Rooster Edition. I have lots of ideas that are not "over the top.
It's crazy to me that you got the letter. I see so many small decal websites with these "bed decals" selling the ram head ones.
I'm thinking about trying to do it with some cheap vinyl, but what would suck is when I get it on good, I'll know in my mind I have an inferior product on my truck.
-
2 hours ago, MrJoel said:If you go 751, don’t just heat that bottom crease in... you have pop it up and work it in. I do a lot of fleet work and quite a few stripes too... every time we get a truck in with a groove that deep that was just bridges and heated in, its popped up and cracked.
I won't heat the bottom crease. I'm thinking, I may be able to cut the whole thing perfect so I don't have to mess with the fender much. I was out looking at it and I think i can squeeze it between. Do you have any tips on how to keep it straight? Just the basic hinge method?
Also I've never used knifeless, does it fine with regular 751, or only wrap vinyl?
-
1 hour ago, Dakotagrafx said:Advice would be to use a cast vinyl and make extra ones
Oh I plan on making extras for sure
1 hour ago, darcshadow said:Knifeless tape would be an option as well. Although I believe it is intended more for wrap vinyl, it should work with cast vinyl.
The black strip is going to have some design in it, so knifeless tape wouldnt work to well for me. I've never worked with wrap vinyl, can I use it on my cutter just the same as cast?
Edit: knifeless may work. It may work for one of my other projects as well, again something I haven't used.
-
Hey everyone
I got a new truck the other day and I want to add some decals on the paint. I want to add a vertical decal on the back of the bed, like in the image attached. The other attached image is the same bed style as my truck (neither of these are my truck, just internet pictures). Now when I add it, I may go over the wheel well fender area a little, which is what worries me. I don't want to have the contour/body line of the fender pull the bottom of the decal to the side, ya know?
I was thinking heating lightly with a heat gun would help. I was thinking 751 would be the best for me to use. Any suggestions?


-
Hey everyone
You l have helped me a ton, now I have another question.
I am going to purchase some Siser Easy Weed. How does this cut compared to regular vinyl? Do I need to cut faster, slower, heavier, lighter? I know weeding can be a little more difficult.
Is there anything special I need to know about?
I'm going to buy a cheap eBay heat press with hat attachment. I am not making things to sell, just for personal use and to play with.
What shirts and hats are good to press? What's a good source for shirts and hats??
Thanks everyone!
-
7 minutes ago, darcshadow said:Have you tried laying the decal face down and pealing the backing away from the decal rather than pealing the decal away from the backing?
I have and no luck
-
1 hour ago, MZ SKEETER said:Are you saying that the ends of the transfer tape curl up or what? I would not use hairspray. Can't you just tape the transfer tape ends down with cellophane tape, then squeegee it real good. I tape the ends of my transfer tape all the time, because I ship them. And I only use medium tack paper transfer tape. . Maybe show a picture.
The ends don't curl up at all. I did a sample cut to test this vinyl, and I mean the vinyl does not release from the backing paper. The vinyl just stays on the backing paper instead of sticking to the transfer tape.
-
Hey everyone
So I have someone who wanted a decal on glittery vinyl. Got some ordered and cut the design (very simple design), but the tape will not stick to the vinyl. The glitter vinyl is textured, almost like sandpaper, so i understand why it wont stick. I used the high tack clear uscutter tape, and high tack paper tape. I was thinking trying the paper tape with some hair spray on the tack side. What do you think? Any other suggestions?
Thanks!
-
On 6/12/2017 at 10:06 PM, Primal Decals said:I use the uscutter brand Greenstar paper tape , and i have no complaints when i use it on 951,751,651 http://www.uscutter.com/GreenStar-Layflat-Classic-Transfer-Tape-Medium-Tack-Assorted-Widths
I have some of this, but when I use it with 951, i can't seem to get the edges and corners of th4 tape to stick to the backing paper.
-
I've done that few times and never had an issue.
-
1
-
-
On 6/8/2017 at 7:46 PM, kctrader said:Express Invoice has a free version for small businesses. Basic and simple to use.
Is that an app or a website??
And thanks for everyone's recommendations! I have looked at all of them and they're all great! I'm going to play with all of them to find the best solution for me.
-
Fancy product designer looks good to me. What is it missing that you are looking for? I can see it taking awhile to get it set up, but i see no reason why it wouldn't work for decals.
The 2nd link you posted, if you were doing just text, it would work, but i think it would be a hassle to be honest.
As for the boat link you supplied, to do one like that would be similar to your second link, but i don't see how you could add designs to it.
I'll look around for you too.
-
9 minutes ago, slice&dice said:4x8 table top is the minimum of what I require for making signs.
A 3x7 total space seems insufficient to fit a cutter into, even.
Mine is 4x6, but i wasn't counting the cutter in that since its on a stand.
-
I don't have pictures at the moment, but i have a similar size workspace. One thing that I did, I got the flat clipboard clips and put them in a few spots on the edge of the workspace where I tape, it helps me keep some vinyl flat when it starts to roll when taping it. However, the rest of my workspace is unorganized. I need a bigger area.
-
1
-
-
Hey everyone
I'm having a little trouble with invoicing and receipts. I currently do not have a good way to make them. I don't have a store, I just work out of my house, so I don't need anything too in depth, just something to make basic invoices and receipts. If it keeps track of totals and paid invoices that would be good too, but not necessary. I need to be able to email and print them.
Thanks for your ideas.
Need some help with BN-20 contour cut
in Printers
Posted
Well @Dakotagrafx and @MZ SKEETER thanks for your help. I did have my blade set WAY too deep. It was less than half a CC before, but like you said, that’s not good to go by. Thanks for your help, it’s cutting beautifully now.
also to anyone else who has this issue in the future, you may think your blade depth is good, but if you’re having an issue, it’s too deep.