
rpmrpm
-
Content Count
82 -
Joined
-
Last visited
Posts posted by rpmrpm
-
-
We kind of do need to know........at least what version of Scalp, as......
Scalp 3 does not support distortion
Scalp 4 does and the tool for it is down the left side below the "Knife" and above the "Stencil bridge"
-
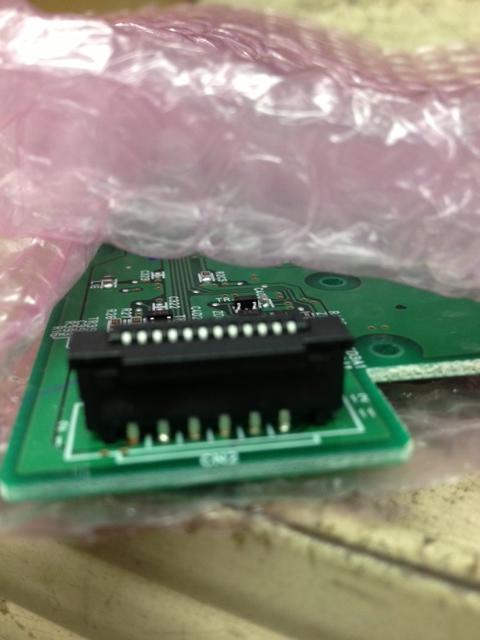
Thank you Google search. I just learned a lot about ribbon cable sizing and numbers. 30pin .5pitch, L??? W15.5 Pick your length.
-
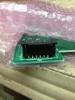
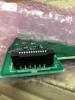
OPEN and CLOSED pictures. You might need to put on (as my wife calls mine) your "old man glasses" to see were to lift with a jewelers flat blade screw driver or box knife.
-
 1
1
-
-
"Greenmachine" has it, the top on the white connection on the circuit board (nearest circuit board edge) will lift up about 1-2mm. Not between the board and socket, but the top of the socket "thick" edge will pop up allowing insertion of the ribbon cable then re-seat the top of the socket, locking in the ribbon. No orientation mark is required because it is one sided contacts.
I can provide pics if required. I do these all the time on automotive audio control circuit boards.
-
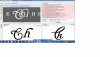
Still testing out the free trial of Findmyfont. And best base font is ITC Zapf Chancery Pro (Demi Bold) w/customized tails.
Mark? How did I do on that one?
-
1
-
-
Look at his ebay store he has more "traditional" size rolls also. FYI, I have never used them.
-
Looks like Purple Oil Slick/Rainbow to me. Ebay search "oil slick vinyl" or "rainbow vinyl"
-
1
-
-
I have his mega Vault. For the $$ I would purchase it again but it is not all that. I can 2nd the swapmeet disc, I have pulled out many handy images from those, but never used a complete one.
On a side note a couple weeks back he stiffed me $$ for a vectoring fee that he said he emailed out. After repeated emails over a week period I finally caught him off guard on his phone while driving. He remembered drawing it, claimed he sent it out and said he would resend a copy that evening. 3 more attempted emails and 3 more voice mails I gave up and cut my loss. PayPal will not take the dispute because it is a "digital service".
-
So I am on the trial version of Find my Font and have been following along trying to ID requested fonts. But have had very limited results. Admittedly I have spent very little time w/the program (it is on my work laptop and I make ID attempts at lunch break)
Mark can you offer any pointers with this program to improve my results (at this point I'm not $50 sold at all)
-
These threads should help you. Latter is detailed.
http://forum.uscutter.com/index.php?/topic/48656-cutter-cutting-decals-slightly-too-large/
http://forum.uscutter.com/index.php?/topic/39370-cutting-too-large/
-
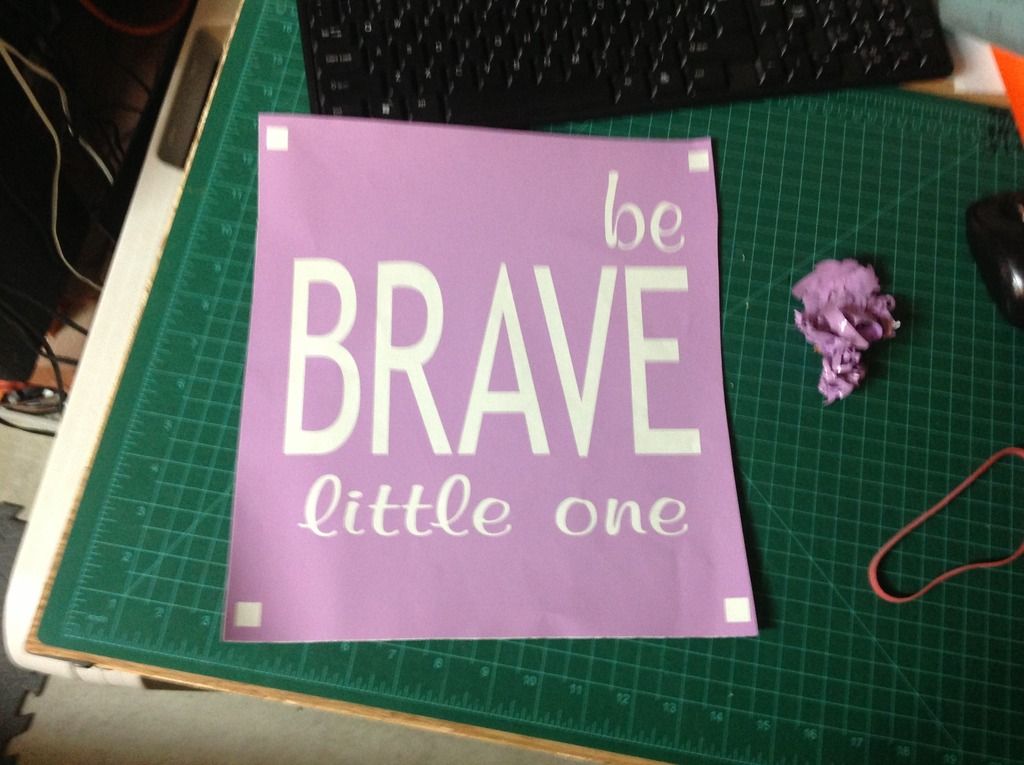
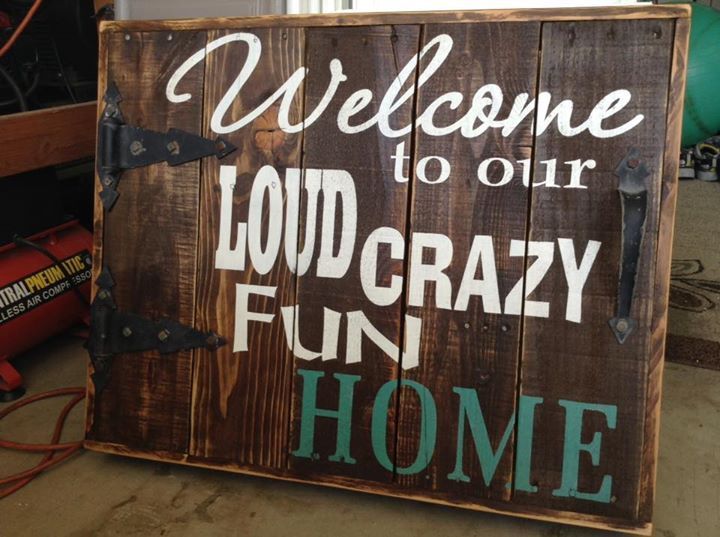
Just to clarify, our signs are all painted. The vinyl decal/paint mask/stencil is removed after the words have been painted and it is discarded. This is one of our purple greenstar vinyl stencils before app tap is applied. Applying adhesive vinyl words over aged wood has a poor result. (even if you use mat finish vinyl)
I will add a roll of Oracal 813 to my next order and see how it does for us. And correct 651 and wht or blk greenstar has to high of a tack. That is why we have gone with the odd colors of greenstar. Not sure if it is a different formula or maybe old stock but the tack level is appropriate and yet the material still bites into the grain of the wood reducing paint bleed. And on our weathered signs the occasional sliver just adds character.
-
2
-
-
This is the style sign my wife and I make. We use greenstar vinyl as a paint mask/stencil, but each color is has a little different "stick". Currently using a roll of this. In 042 purple, but some times the vinyl will lift wood slivers when removing after painting.
http://www.uscutter.com/GreenStar-Intermediate-Calendered-Vinyl-24-x-50-Yard-Roll-3mil
You will need to develop a dry application technique for painting (brush or sponge) or will experience "bleeding" of heavy grained aged woods. Trying to make things look old but crisp is not as easy as it looks at times.
I agree with all the above advise. Learning how to make and apply a tradition vinyl decal will teach you techniques that will come in handy for what you want to do. I would look a 24" machine and approx $1000 budget to be up and going. PLUS lots of learning (start reading old threads here)

-
1
-
-
My guess.
Research blade offset and adjust for your new blade. Different brand blades and deg will require different offset settings.
-
I would say best way is to send it to WildGoose, have lunch, make very resonable Payment, open recieved SVG and move on with the day.

-
4
-
-
Yes SCALP4 will open all previus versions. But will ask you to resave as a scut4 file extension if you need to modify and resave.
-
1
-
-
I have been dying to "up my game", wait I have no game. Rephrase that, ad yet another hobby and build a large format CNC router. A friend in Texas just finished a Green Bull from buildyourcnc.com and I am so jealous.
https://buildyourcnc.com/greenBullCNCMachineKit.aspx
While it does not fit EFIMAGE prerequisite of no MDF construction. It posts a integral dust containment system and the ability to add laser & dedicated liquid cooled spindle (apposed to router head)
If the Probotix Comet offers a dust collection solution I would suggest it for your heath. A local friend has a home build 2'x3' and it makes a hell of a mess and some nasty fine dust. He finally made a pull threw "hood" for it with home A/C filters and Lowes blue foam.
As previously stated, please share your work as you progress.
-
Would love to see the OP's face when he realizes the cost involved.
To xxqdogg6198 ask here, this forum is full of professionals that will gladly take the business.
-
Load from disc or download (latest version) from Craftedge all you want and on as many machines. As Jaybird stated the license allows activation on 2 computers. If switching computers, deactivate old before setting up new. If you can not (crash/failure) you must contact craftedge to help you deactivate old computer.
http://www.craftedge.com/download/download.html
Personally I keep one computer (work shop) at my cutter always active and have switched the other activation between my house PC or my work laptop a couple times.
-
2
-
-
akumbc - I ran my small business on a P-Cut for several years. It is no longer available but the Laser Point 2 is basically in the same league, about 2 steps above the bottom. Once I switched to a good servo cutter my quality of work improved a surprising amount, especially on the small stuff and I saved a lot of money on messed up work when the P-Cut would off-track or wig out. Budget cutters are surprisingly accurate but then you step into the servo world and are amazed at the minute detail that shows up. I didn't realize that I was missing anything.Your basic question is will the MH get it done. Probably. How much more to step up to the SC? Worth every penny and the next step too up to the LP2 is worth it too if you can find the money. The budget cutters do mid sized stuff that ranges from 10" to 24" with reasonably sized lettering and detail good enough. When you step up to do very large/long or really small stuff they start to show their weakness. I needed a machine that could do many multiple copies without problems and that motivated my purchase. It's not hard to achieve ROI with a vinyl cutter and a little effort.
This is one of the best worded posts I have read on here. It needs to be stickied in the pre purchase section.
The second paragraph about budget cutters is so spot-on.
On a side note, in the long run having owned a budget cutter has taught me allot.
-
1
-
-
Why not use 951 -070M Matte black. Or have I just exposed some of my lack of knowledge and a matte and satin are way different??
http://www.uscutter.com/ORACAL-951-Premium-Cast-Vinyl-24-x-10-Yard-Roll
The cheap china wrap I have been cutting to decals only holds up as long as 651.
-
Once again, in all my dealings with (and as frustrated as I might or might not have been) USCutter has ALWAYS taken care of me in the end.
I wish more companies could resolve product issues like they do.
Good luck with your replacement and happy cutting.
PS hats off for posting the follow up.
-
3
-
-
On the MH series 3" out is the "zero" point for material. Hit reset or power cycle the machine to obtain a "home" position and clear out the limited memory after each job. As noted, spread out your pinch rollers across the machine, but not over marked center. To custom position the start of a cut use the "offline/pause" button & then use arrows to move around cut head and material to desired start location. Then hit "origin" to place back in cut mode.
Material origin for "zero"
After selecting the cut tab use the preview window to help with making sure you are laid out correctly. Look at the arrows and graphic of the cutter and it's control panel to determine if it will cut correctly. Sacrifice a .99 cent roll of mailing paper ( or back of vinyl carrier sheet) and use your pen ( or rig up a sharply) and start testing out different lay-outs to see what works best for you. I never could mentally get used to how horizontal/landscape mode cut and would make mistakes.
Vertical/Portrait preview
Horizontal/Landscape preview
Design in what ever mat size you need, but I always revert back to my material size before cutting to aid in not making these types of mistakes.
-
1
-
-
Subcribed & looking forward to your progress.
-
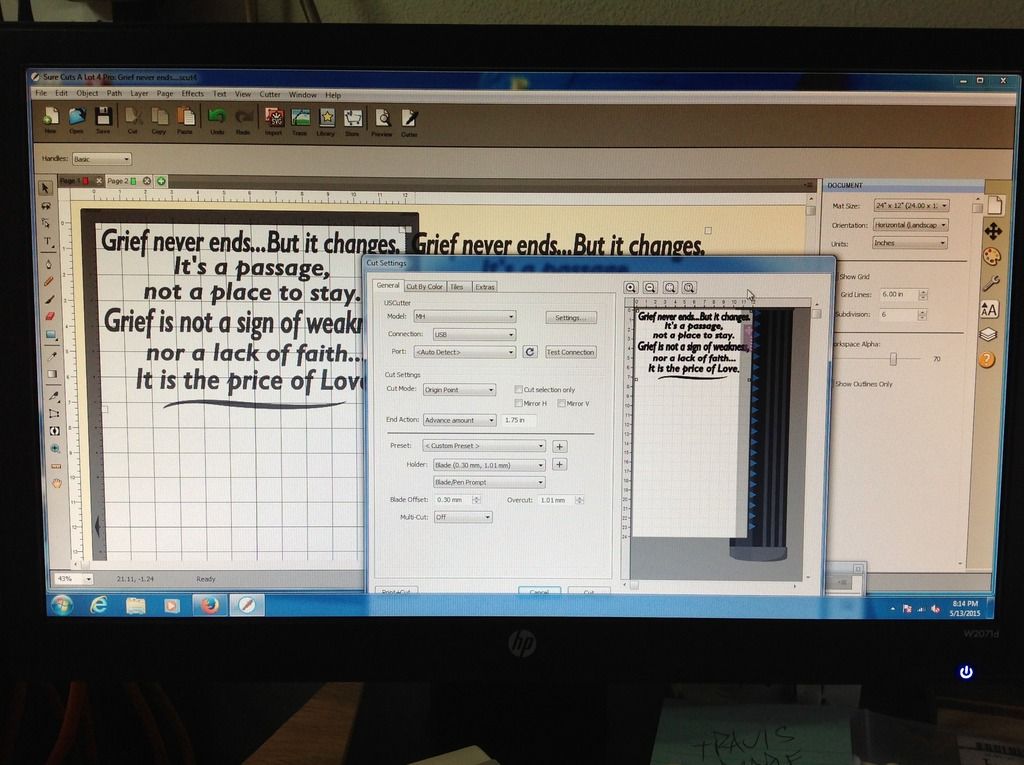
In SCALP Open Cutter tab then Cutter settings and lower the resolution by trial and error. I cut a .250 tall 12" wide sample and adjust till it cuts exact. My machine takes .985 for X&Y.


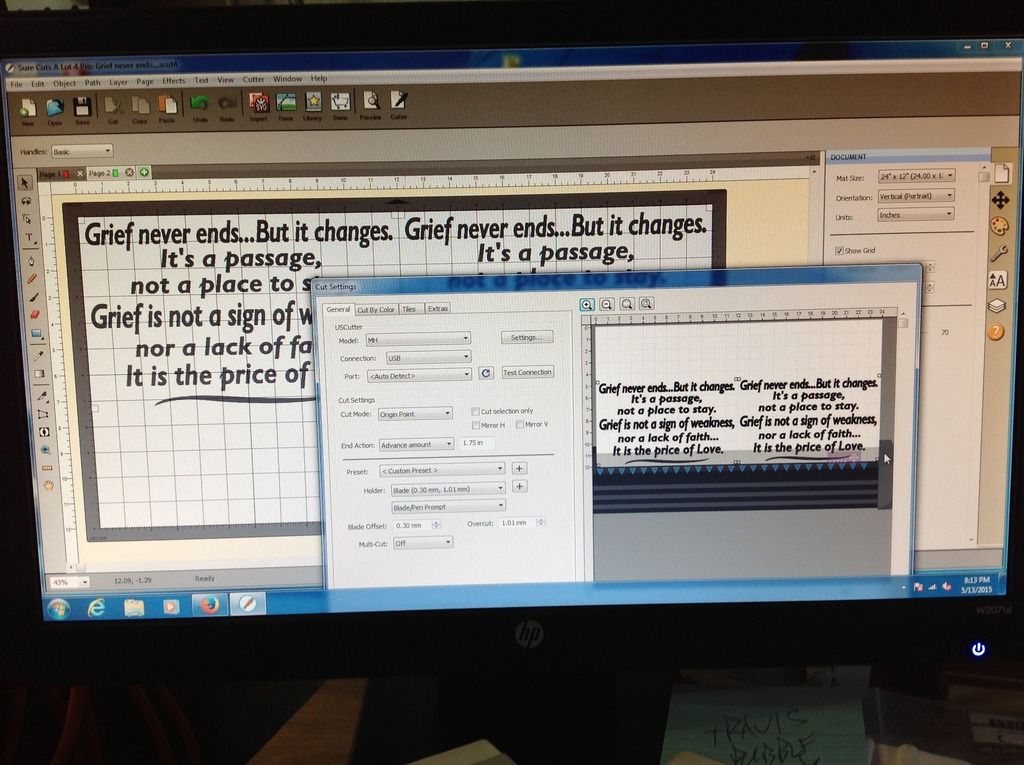
How to cut a tapered design
in Sure Cuts A Lot Pro
Posted
I think USCutter is still shipping Scal 3 Pro with purchase.
Check out this guys tutorials on Scal 3 it helped me a lot when I started. (I see he has done more on Scal 4 that I need to watch)
https://www.youtube.com/user/ScrappyDewCreations/search?query=sure+cuts