
mikerob2334
-
Content Count
434 -
Joined
-
Last visited
Posts posted by mikerob2334
-
-
I see what you mean on the Tomahawk. I just did a total weld and grouped the letters. Didn't see anything wrong with the Hatchet other than the little overlap at the bottom of the e. Just deleted a few nodes there. Hope this is what you need. Guess I was trying to over complicate things

-
Anyone have any guitar hero templates?
-
If it wasn't something you were in a hurry to get it would have taken 2 days.
-
I thought this was a joke until I went to the website. You have to read the reviews on the bottom of this page.
http://www.walmart.com/catalog/product.do?product_id=12569361
-
here's a video of the 2 layer
-
2.) You selected the area between the 2 connected legs then you deleted the gray area then you clicked on Undo. Why did you do this?
I didn't realize that the black was a solid color, so I undid the delete so i could punch the grey are through the black to make a hole
3.) You then selected that same area again then brought up the Color Select box and there was an X in the black and X on the White and the gray was ok
4.) Took the X off of the Black
did this to select both the grey areas and the black areas without the white
5.) Clicked on Arrange - Weld - Punch through then closed the Color Select box - What exactly does this do?
this punches a hole thrugh the black
6.) Selected the area between the legs again and deleted the gray area. Why did you have to go back and select this area again?
after punching a hole through the black you want to remove the part to show the empty space between the legs
7.) Select the image click Arrange then Put to back - why did you do this?
i selected the black part only and put this to the back because during the process of everything else some of the white areas got moved behind the black
8.) Put a circle in then brought up the alignment - Why do you need the alignment? Can't you just place the circle anywhere within the image location?
9.) Brought up the alignment again and put a white circle inside of the black circle and then aligned the white circle in the middle of the black circle and then duplicated the circle. Why did you have to put a white circle in there?
10.) You grouped the image and the circles all together
the circles are for aligning the vinyl after it is cut. don't have to align them, i just like to have them centered. when you stack the circles you select them and use the punch tool to punch hole through the black circle. when you weed the black you will have a circle with another circle inside. you remove the inner circle so you have a black ring. when you wee the white you will have only a circle.
11.) Click cut and a complete black image shows up
12.) On the left of the screen you take the X off of the white and put an X on the Black and only the white pieces show up. Were you showing me that with the white pieces showing up it would only cut the white and I should do that?
with the black image shown, load your black vinyl and cut it. after that load your white vinyl, click the white on the left so the white shows up on the cut screen and then cut your white vinyl. weed both. apply app tape to the white. peel backing off. line up the white circles that are there in the center of the black ring and smooth you tape/white onto the black vinyl
did you watch the video of the two layer decals??
-
Thanks for the quick reply, I am sory to be a pain, but I have tried several times to upload image ,but it times out , the file is EPS, 11.8 MB, do I have to reduce the size of the file, If so, how do I do this, Thanks again, Mark
There's a max of 512kb /post
-
Depends on what type of vinyl you're using. Chances are it's going to be a 45
-
Here's the video of it. When you cut them, the 1st layer to mask would be the white. Then pull the white off the backing and line up the circles to lay the white on top of the black. If you search from the home page there is a video on layering.
-
If you'll post up the vector file so I don't have to re-vector it, I will do it and make a video to post up with the file.
-
Nice!!
-
Select the graphic, click arrange-split objects. The white parts will turn grey. You can then make them any color you want. Add registration marks and cut in two colors, then layer them.
-
they look good
-
I can't speak for the espeed, but the Rockstar logo is fine. I opened the .sbe file Mader posted, resized it only and cut it. There are no errant nodes, etc. It cut perfectly on my LP24.
Then the Refine cutters have a problem. I did NOTHING to the .sbe Mader posted (no resize, nothing) and it cut jagged. If you look close the corners have nodes stacked on each other. When I deleted these extra nodes to just one per corner it cleared it up. The LP24 may deal with stuff like this better than the refines, but the extra nodes are there and do cause a problem at least as far as my cutter goes.
But as far as cutting other files, mine does the same thing just not as noticeable. My buddy has an 871 and his cuts jagged just like Mader's. I'm not complaining about mine since it's not obvious, but we chose to buy lower end cutters and it looks like they put out lower end quality. Just need to buy higher quality I guess.
-
what I need is the Tomahawk and the Hatchets wording not to overlap.For some reason it wouldn't let me weld them together.
I guess I'm confused because there are two tomahawk words and two hatchet words. What item do you not want to overlap what item?
Sorry, trying to help but I'm just not thinking straight today. Is this what you mean?


-
Is this what you are talking about? Using weld-punch?
with outline has a gap between colors. needs cleanup.
-
Not sure what you're trying to do?
-
The only difference with the machines is the scale actually ties into the computer so you don't have to type it in. But since you have to type the send to info in anyway what's a few more key strokes??
-
I think this is what you want: http://www.stamps.com/welcome/
Best thing though is to just buy a digital scale (about $40 from office depot), print your postage from usps.com and schedule a pickup if you have a lot of items. No real need to pay for a service.
-
Yep, photos are copywritten too, but Fivestar is thinking out of the box here. You can always hire a 3D-artist to make a few custom room that you can use over and over if you want something that's yours for life. Nothing fancy..just a basic room with some minimalist furniture...or just photograph a room (then it's your copyright) and re-use it.
wonder if anyone knows a good artist that can do this. think i might have seen someone on here like that -
E speed? I have set the speed on the cutter from slow to fast and in setup in SBE all I see is Speed-Inch/Sec. and mine has 33.43 in it that is grayed out. (can't change it) This is in the Vinyl Size portion of the setup pop up box.
press the setup button on your cutter and you will see the espeed setting. and i also tried files other than the rockstar logo. i knew it was messed up to start with.
-
signblazer
-
I've been workin on it for about 30min.
The only way I can think of is the trace out each part for each different color. Heres what I've got so far.
I just used your eps, deleted the traces, selected all then split. then you can select areas or groups and re-color.
-


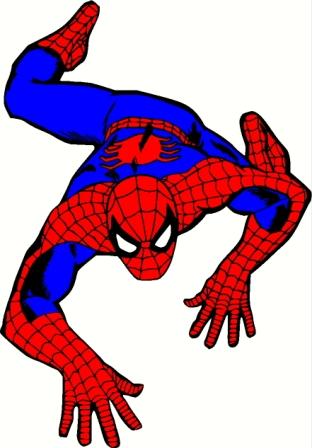
need someone to vectorize this image
in Vectorizing
Posted
I had to weed a Spiderman that was a little more complex for my son. I'll never do another one.