
dwp99
-
Content Count
1,202 -
Joined
-
Last visited
-
Days Won
14
Posts posted by dwp99
-
-
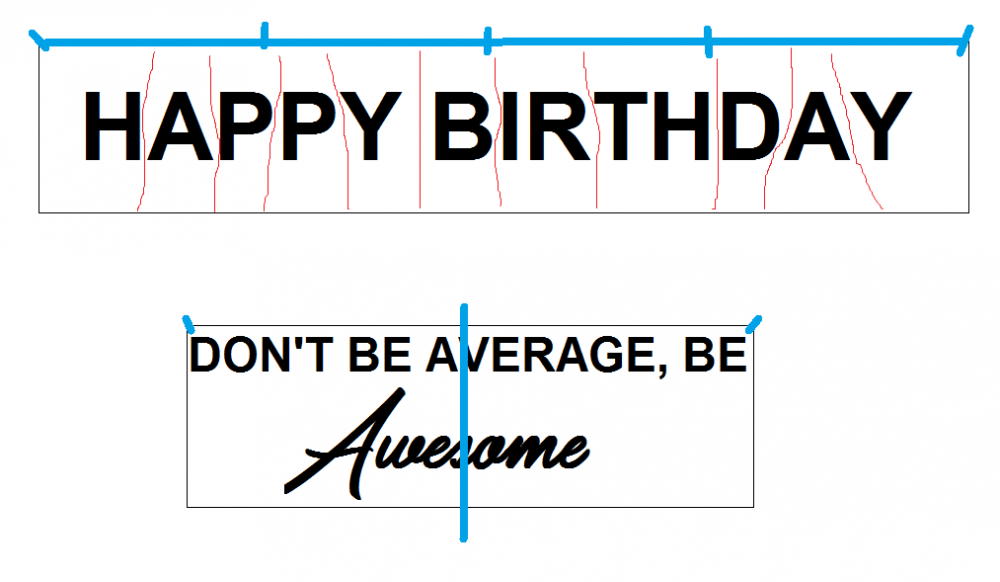
Once leveled and taped at the top to hold it in place using blue painters tape. You can place a long piece of painters tape across the top to form a hinge, then cut up between the letters to apply them individually.
Or if you have a graphic like in example #2 use a vertical hinge, peel the backing back to the blue tape and cut it off, then apply that half of the decal. remove the blue tape hinge peel the backing off of the second half and apply the other half of the decal.
-
 4
4
-
-
On 9/1/2022 at 9:05 AM, Wildgoose said:In this pic you reposted they have the left one moved off the detent position and that's most likely the problem. Left set and the right slides. Your question about the cutting head is valid if the cutter is turned on in this pic because it will move over, self check and then park just inside the right roller. It could be the angle of the shot because one of the other I couldn't see the pics roller due to the carriage head being where it should be. Perhaps they shut it off and pushed the head over?
Wild Goose
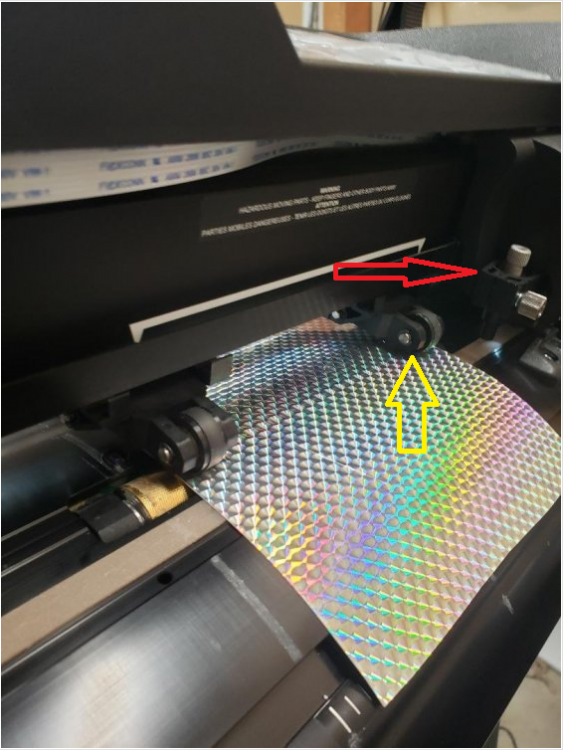
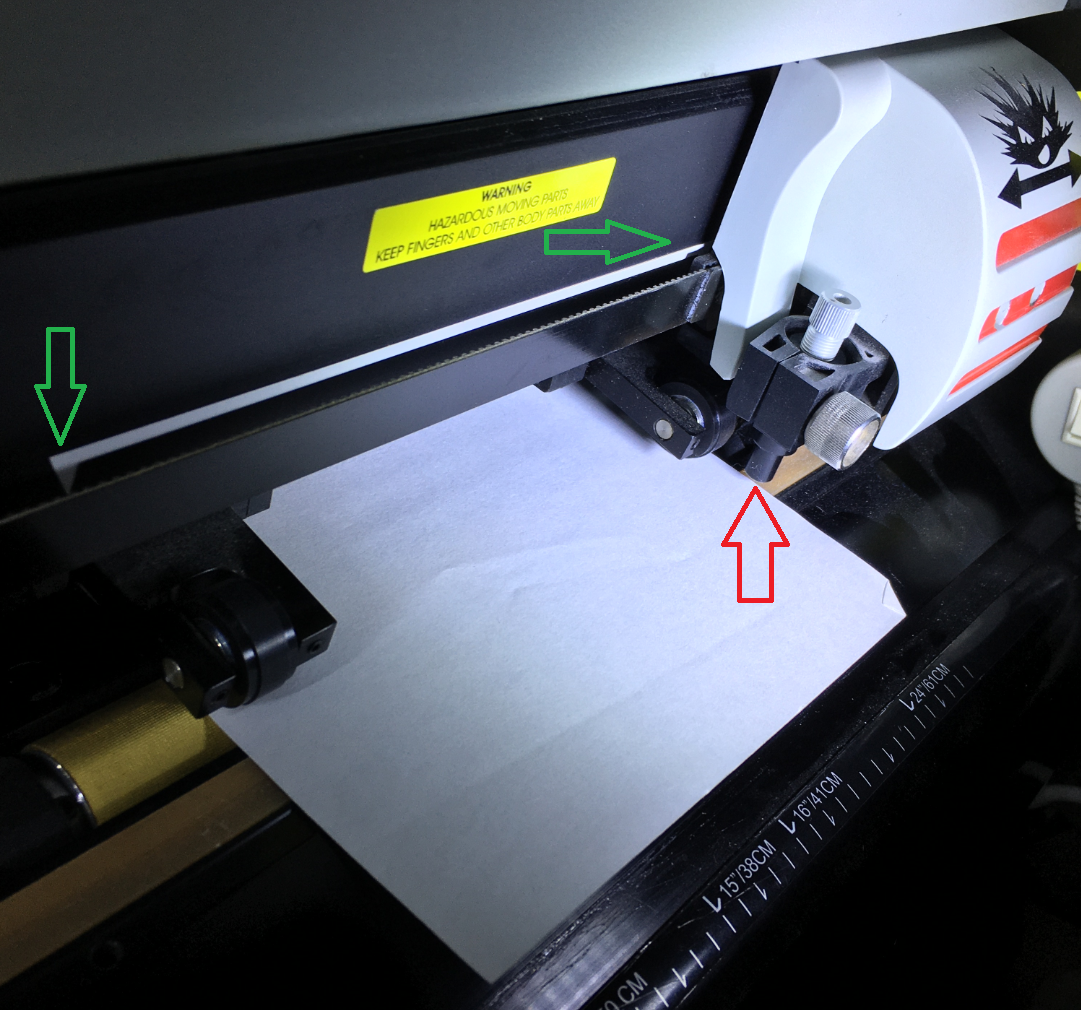
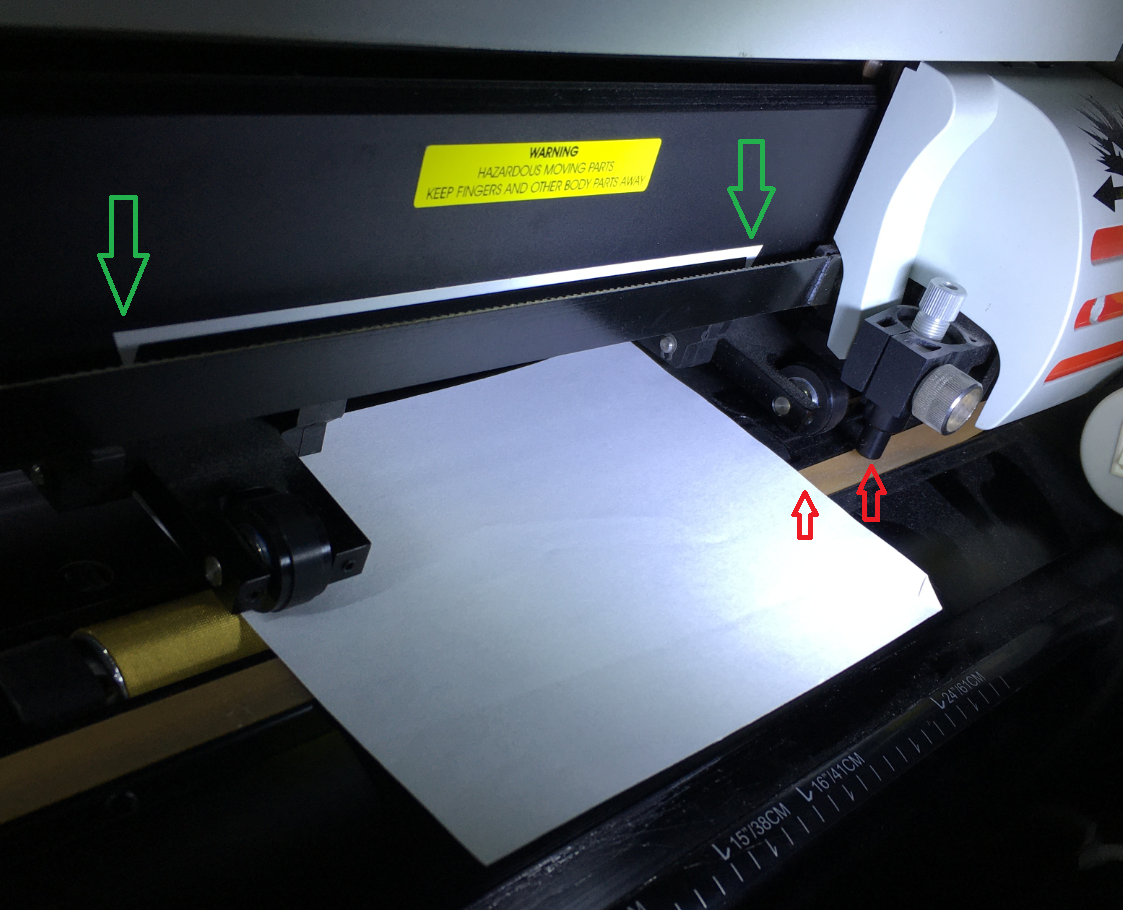
I just marked up the OP's photo. I went over to my Summa D60 and tried to replicate the same photo. I used a piece of paper so it could be seen better. The pinch rollers are all the way down, the one on the right is in the detent, the left one isn't in the detent. The carriage is pushed all the way to the carriage (right) and you can't see the downward pointing white arrow on the right side like you can in the OP's photo.

The only way I could get the far right white arrow to show in the photo was to, lift the pinch rollers and slide the carriage over to the right, which drug the pinch roller off of the white paper and grit roller.
The white paper is positioned to cover the right end of the grit roller. You'll also notice the gap between the edge of the paper and the knife holder is further apart than my photo above but the same as the OP's photo.

I added the OP's photo just so it would be close to my post. There is no way my Summa's carriage will go that far past the right pinch roller. That's the only reason I mentioned it in my post.
Maybe the newer Summa plotters will.
-
1
-
-

I'm really not sure since I don't use Summa Cut or GoSign. I'm a Flexisign user.
There is one thing that I noticed on your D60. The knife head is on the right of the right pinch roller. I went back to my summa D60 which is an older 24" cut plotter and my knife head is in between the left and right pinch rollers. I don't know if Summa made a change in the D60's over time. Can you push the knife head past the pinch rollers? I can't push the knife head past either of the pinch rollers on my D60.
Does your D60 have 3 pinch rollers? If it does that explains the reason it can pass the center pinch roller.

-
I have no problem cutting vinyl that's only 2" wide on my Summa D60. You need both pinch rollers on the vinyl and the brass roller below.
Hows the blade depth?
-
1
-
-
-
Welcome Back.
-
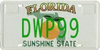
Welcome from Florida
-
 1
1
-
-
Hello and Welcome
-
-
Hello and Welcome from Florida.
-
I've used this on flat black and it really stands out. darcshadow is correct it does fade faster than other colors. The color is not all the way through the vinyl like 951 cor 751 either it's a coating on white vinyl.
-
1
-
-
Hello and Welcome from Florida
-
Yeah I got a metal roller and it will hold a roll up to 27" , I don't know of one that is wider. Good idea making your own.
I lowered my rollers down 2.5" to keep the tape closer to the vinyl.
-
Hello and Welcome.
-
On 9/13/2020 at 8:06 PM, slice&dice said:That app roller rig sits on the edge of a table with a flange, but I find that it's best to anchor it to the table with 2 C-clamps
.
Yup I use 2 C-clamps to hold it to the table.
On 9/14/2020 at 3:12 PM, dvddvd said:Thanks I've ordered one and see how it goes?
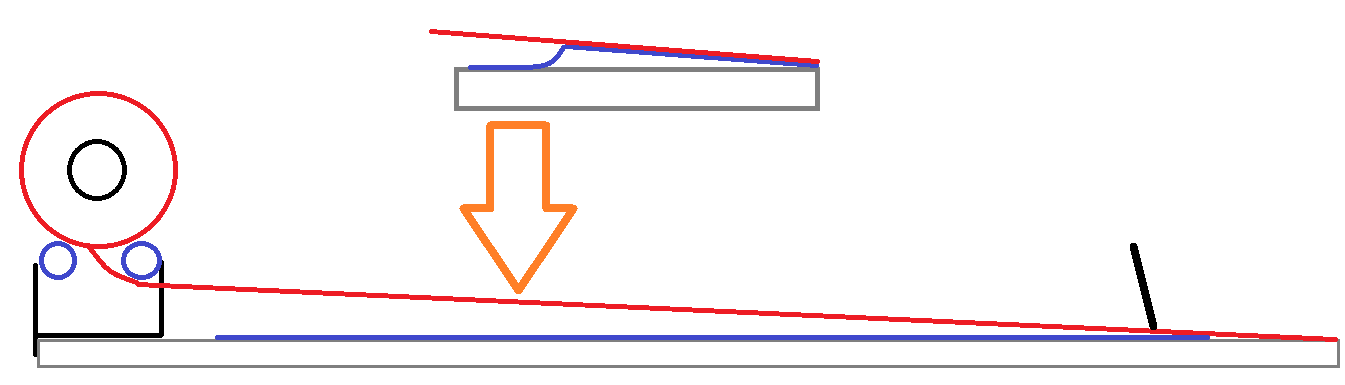
If the work was 6 foot long would I be able to pull out 6 foot of application tape and then stick it at the end and then work toward the roll with a squeegee?
You sure can, you just got to keep it tight. clamp it to the table, lay the decal on the table in front of the rollers and pull off enough tape to cover the whole decal. keeping the Tape tight lay one end of it past the decal and stick it to the table. Start squeegeeing just be careful because the app tape and decal can pull back up off of the table and when you go back to make another pass with the squeegee you can get wrinkles. Use your other hand to help hold the app tape and decal on the table where you have squeegeed. It can take some practice.

-
On 9/20/2020 at 1:21 PM, slice&dice said:Hi Doug, That's more than one question, but let's see where we land.
1. The logo is going to be photographed, which produces a pixel-based graphic. (RASTER)
2. Since you are describing a full-color end result, the use of cut vinyl sounds highly improbable. (Show the logo here if you want).
3. You'll be able to obtain a high-resolution image (.jpeg or .tiff or even .pdf) and just send the raster file to be printed by a wholesale printing company. (Plastisol transfers)
Thanks Slice and Dice, I was wondering what file format could be used. Whenever I do a job that needs to be printed I design in Flexi and save as an AI file to send to the printer.
I Think the wholesale printer I use prints from AI files. But I'm in Florida and my friend is across the country. he'll bring the file to his print source.
On 9/20/2020 at 1:42 PM, Wildgoose said:A lot of images can be paired down to still produce the basic look without all the shading. You can perhaps use just a second highlight color or a shadow to get similar effect. It would help to see the logo. I have converted a couple old school logos to a more modern appearance that could be used in one, two or multiple color options. Start with the very basic lettering or design and then add some of the more complicated elements in where you can.
Thanks Wild Goose, I won't be cutting this one in Vinyl. It's going to be used for Tee shirts and full color decals printed on white vinyl.
Something I know very little about is screen printing, I do know that each color is applied individually and a different screen is needed for each color. I didn't know if my friend would consider Screen Printing and just wanted to be prepared in case he asked. I would think that Screen Printing would need a vector file. I could pair down the colors Like you mention and see if I could make it work.
Thanks again for everyone's help.
-
I've got a question for all you Tee Shirt and Decal printers. I've been asked to take a photograph of a logo that was hand painted on the door of a truck and convert it so it can either be printed on vinyl and contour cut to make a decal or printed on tee Shirts. I'll also ask about the file format for Screen printing on a tee shirt also, just in case that question is asked.
What File format is the preferred format for this procedure? This hand painting has a lot of shading and blending of colors.
I just do cut vinyl and know it would have to be a vector image if I were to cut it out of vinyl.
Thanks in advance,
Doug
-
1
-
-
5 hours ago, dvddvd said:Hi I want to cut some 24 inch x 60 inch wall art from vinyl and then apply the application tape to it.
Ive done smaller pieces before with 12 inch application tape but never with 24 inch wide application tape.
Is there any tips to make it easier or any rigs that can be made to make it easier?
thanks
DVDDVD
Check this out. I have one and it works great. They are giving a free sample of application tape with it. I've used mine with 24" wide tape.
https://www.uscutter.com/Application-Tape-Roller-Package
I did make a modification to mine though. I moved the rollers closer to the table top by drilling 4 new holes to lower the rollers.
-
Hello and welcome.
-
Hello and Welcome.
-
Hello and Welcome.
-
I don't know if you can open EPS files in Vinyl Master, but here's what you are looking for.
-
Well I followed the link you posted and found out that the channel creator is based in Hong Kong. They are calling it an iron on patch but no where in the description do they identify the vinyl or if it is printed or laminated. There is a link in the description of the video to purchase to patches. You can also get the email address of the channel creator or leave a comment on the video asking what type of vinyl it is and if it's printed and laminated.
-
Hello and Welcome.


I won a Summa Sign D1010 at auction, I don't know anything about it.
in Competitor Cutter Help
Posted
Hi Galts,
Like everyone is saying the Summa is a great plotter. It's made in Belgium and it's a workhorse. I have a D60 24" plotter that I bought used in 2008 and it's going strong. I only had to replace the power supply and the pinch rollers. I was able to find a power supply on eBay. The brand they use is "Mean Well" and there is a decal on a capacitor with the model number. Here's a link to the service manual https://www.manualslib.com/products/Summa-Summasign-D1010-5542345.html
I will admit that Summa is proud of their parts.