

Wildgoose
-
Content Count
6,515 -
Joined
-
Last visited
-
Days Won
293
Posts posted by Wildgoose
-
-
I'm heading out later after work.Anyone have a suggestion for what to buy from HF to shoot media?
Being totally a newbie to this. I have now purchased a small pressure pot AND a table top cabinet. My observation is that the cabinet and siphon style gun are real simple and easy to use. A lot less control though because they have bigger tips and use more air to create enough pull to suck up the grit but having a trigger right there to control is sweet and probably how I would have started had I known the cabinet came with a gun. My HF guy told be it didn't. LOL. Even if I had gotten the pressure pot only, I would have went back and bought the cabinet to have control of the dust and media. Now for the pressure pot I went ahead and put it together and actually have used it more because you can turn the pressure way down and just kind of take it easy which is nice, especially with using the Green Star vinyl as a resist for light glass work. You have to let it get going for 30 seconds to a minute so it will smooth out. Right at first it shoots a ton of media out but then once the line clears it runs great. The down side it that you can't really control the overall thing as handy. There is a valve out at the work end but it's just for all the way on or all the way off. The main control valves are at the pressure pot and you have your hands stuck in rubber gloves in the cabinet so... If you try to regulate things at the work end they say you'll wear out the valve and I believe it. So to start with you're going to want a cabinet in my opinion. You can add to that as you go.
-
 1
1
-
-
I have some of the thick 3M reflective I'll trade for that if he passes. It's like duct tape, I can't use it at all. I'll have to look and see how much I have, but thinking it's two 5' rolls of 54" material.Go for it. I think I'll hang on to the reflective for now.
-
That's nice work, very cool!
-
I bought some adhesive remover at a local auto paint supply that came in an aerosol can and did a great job. It softened up the old cracked stuff that I was removing and let me scrape it off with a plastic edged scaper tool. It's called Aircraft Decal and Adhesive Remover made by Klean Strip. There are probably a lot of other similar brands. What is funny as all get out is the very last line in the warning label says "DO NOT USE ON AIRCRAFT" HA HA! WTF is that all about? why put that in the name of the product at all is beyond me. Great stuff though. Just use it on a small area at a time because if you let it sit then the vinyl sets back down and re-attaches itself.
You might want to have them sign a waiver so you are not responsible if you damage the paint beneath. I have caused minor problems on removals before. It's a good idea to warn them that it's a strong possibility that there will be some damage. trailers are often painted with lower quality products and rarely have a clear coat.
-
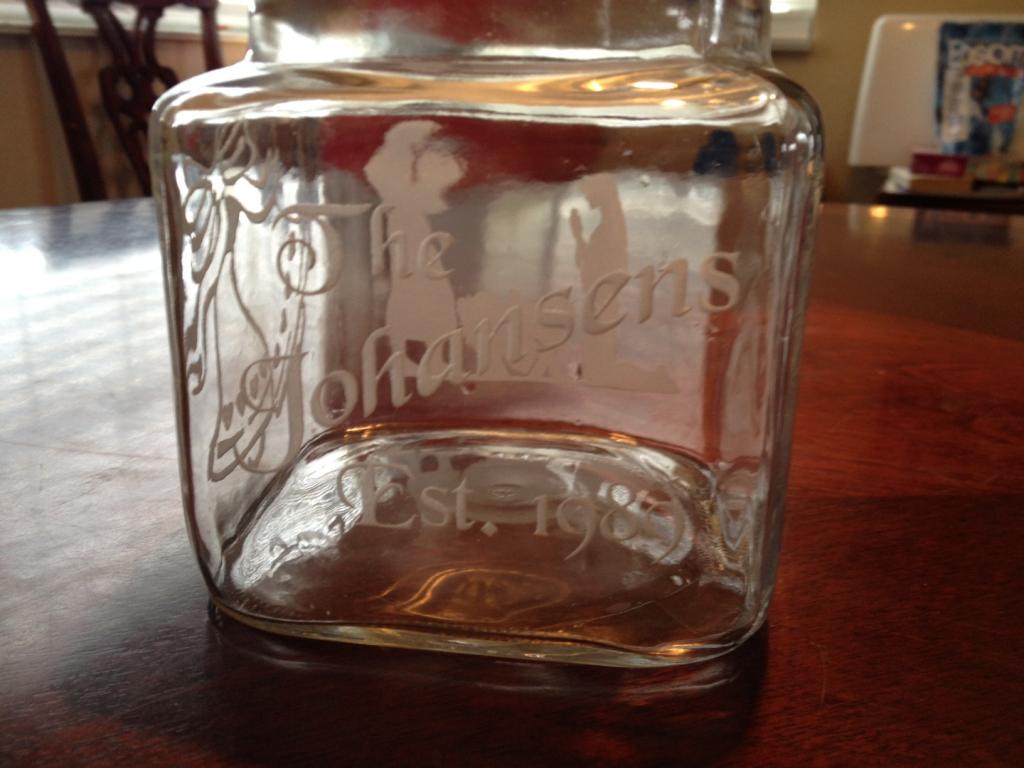
I ended up finding a local supplier who makes media out of recycled porcelain here in the valley. 50lbs for $35 which included a bucket. They call it "White Lightening" It's 100grit and I had time to do a few test runs on glass. He said I should be able to get a couple uses out of it before it gets too fine. Worked great so I plan to save the alum oxide for heavier cutting. I have a roll of 3M reflective digital media that I got them to send for free as a demo and I found that it works pretty good for a resist on smooth stuff. I doubt I can carve very long on things without blasting through but for the moment it's my main blast resist. I also had reasonable success with some of the Green Star cheap vinyl that I have laying around. If I keep the pressure low and am using the White Lightening I can do quick glass etching without blowing through it. I have a roll of the cheaper sandblast resist coming from USCutter to get me really going and I'm sure eventually I'll get some of the good stuff but I will need a paying job first for the spendy Anchor products. Right now I'm doing some cheap glass cookie jars from the "Big Lots" store that I grabbed for $4-$5 each to give to family friends for Christmas. I'll attach a pic of one. Kind of crappy photo but you can still see the basics.
-
1
-
-
PM sent
-
DO spend a little extra time when masking to cut a nice consistent offset along the sides of your vinyl. Helps a TON on install for centering and leveling etc...particularly if you are using a script font or a design that doesn't have a natural line to measure from.
DO buy good quality masking tape for installs. I buy mine from a auto paint store. Cost a little more per roll but you don't need to waste as much double taping or worse waste expensive vinyl that hits the dirt when your Walmart tape gives out.
-
1
-
-
If you have signblazer working for you you might as well do the rest of the design all at once in that program. it's superior to SCALP anyway. I don't know much about Signblazer but I think it can talk to your cutter on most USCutter brands and you can cut right from there and skip SCALP altogether.
-
1
-
-
No problem, glad to be of help. Illustrator is a big program and there are a bunch of cool shortcuts, the trick is figuring out where they are all hiding!
 In truth Illustrator is partly huge from being able to do more complicated graphics like web design stuff but for vinyl work life is much simpler. Once you sort through the stuff you don't need then whats left isn't as bad as it seems early on. One of the biggest tricks I have learned over the years is that in most circumstances it is best to convert objects like words into a compound shape. This is particularly needed when using the pathfinder tools. Pathfinder typically acts on things based on their relative position in the stack. Words, even when grouped are in a certain order and often you will have problems trying to offset paths etc like when you create an outline for a background color. Forcing you to do one letter at a time. If you take a second and make the group a compound shape then the program treats it as ONE object and everything goes the way you intended and you don't have to go through and unite a whole second set of background objects etc... Give it a try and you'll see what I'm talking about. I'm not sure what version you're running but [object>compound paths>make] should be the process in the pull down menu. The shortcut is command>8 (or ctrl>8 on a pc). Definitely worth learning the shortcut keys for some of this stuff, then it just takes a quick blip of the keys and your moving on. Keep your eye on the objects because a lot of actions turn things back into groups and you may have to convert them back into compound shapes several times during a build depending on what your doing. You can release the compound shape from the pull down menu also should the need arise.
 -
Nice! Thanks for thinking of us!
-
Okay, that tells us that SCALP tracing is the culprit. You might want to download a copy of Inkscape. It's a free open source program that does a pretty good job of things. I'm an illustrator guy so I don't know my way around Inkscape as well but I have a copy on my day job computer and fumble around with it from time to time. It doesn't have some of the Cadillac features that I have gotten used to but with some practice I think you can create about anything you want with it. SCALP is a decent cutting tool but it is lacking in the design side of things. I would recommend just using it as your cutting program and do you design elsewhere.
-
1
-
-
Be careful with the pathfinder tools. Some create a separate object for the open/white areas. No big deal but your cutter may try to cut them out again making a second pass and a mess of your cut. I usually try to use "Unite" as it doesn't cause these problems. Any time you live trace a B&W you usually have a white layer strewn about and several of the pathfinder options do it. It's a part of the overall function and is actually what you might want in some instances.
Best way to clear out any white or unfilled paths is to look at the objects in the stack within the layers panel (usually on the right hand side) You should see small previews of each object. If any are clear/white then select it by clicking the little square on the right side of that particular object in the layers panel. Take a look at it on the screen at that point and see if in fact it is supposed to be a hole rather than an object then go to the little tab at the top that has a little arrow and two roundish shapes, it will show you a little sentence that says "Select similar objects" if you hover over it with the mouse. If you pull that menu down you can select everything with a similar fill and it will select all the unfilled objects that are in your document assuming you haven't locked anything. Then just push delete and they go away. As long as your design still looks right then you are done and you should see all the unfilled objects have been deleted in the layers panel.
-
Awesome info Graniteguy. Thank you. I will look at some better tips for sure.
-
Ya giving it away is trademark infringement in the form of "diluting their market" rather than copyright infringement but could probably be just as big of a deal.
-
Ah freak! More questions! Sorry to keep bugging you guys. So the HF dude didn't know what he was talking about. Why does that surprise me? Anyway, the blast cabinet DID in fact come with a siphon gun and some tips! Whoo hooo! I bought the pressure pot to do the blasting but now I have options. Therein is the problem. Being a total newby what are you guys who know what your doing recommendations on which gun is going to do the best for be. I see the orifice on the siphon gun are HUGE compared to the ones in the pressure pot. The instructions on the siphon gun specifically say NOT to use harsh abrasives like Aluminum Oxide which is what I plan to start with. So my thoughts are to try out the pressure pot first and see how it does then maybe get around to the siphon gun later maybe with some actual sand or something.
Any opinions welcome. I am asking because I still have all night to put the pressure pot together so I will be stewing over this the whole time. I'm anal like that sometimes. kind of excited to have both to tell the truth.
-
Toggle OFF preview mode to outline mode. #clarification#
-
If you have the pen attachment and some butcher paper I would suggest playing around with that rather than wasting vinyl to get things dialed in.
-
I'm going to take a guess and say that your file had stroke weight which fooled you on the look vs what you got. In illustrator with the file open pull down the view menu on the top of the page pull it down and toggle the preview mode and see if you have the same look minus the fill colors or if you get something different. You should be able to view it as just lines and curves, this is actually what the cutter gets, the fills and line weight don't exist in the cutters world.
-
DON"T turn your back on the 18 month old hanging out with you as you are building a project.
-
I bought the cabinet that has no stand and is just a cabinet to control the dust and media. I bought the small 20lb pressurized blaster to use with the cabinet. The bigger cabinet appeared to be a suction type unit. Being unfamiliar I opted for the one my feeble brain could comprehend the best. (also the cheaper option and a little less permanent)
I did some more reading tonight and it looks like neither the Alum Oxide or the silicon carbide are considered hazardous by way of silica so that makes me feel better. I think I'll try starting out with a few cheap glass objects to give out for christmas and experiment from there. Hoping the aluminum Oxide will still be able to cut natural river stones and floor tiles so I don't have to mess with different media right off the get go. The sites I read from were unclear. Sounds like it will work but probably take a little more time. Also sounds like as the alum oxide breaks down I can still use the finer product for glass etching and stuff that didn't need the raw cutting power of 70 grit. I'm excited! Love to learn new stuff!
-
Try this version to see if it will cut it. It's in illustrator version CS5 but last time I was using SCALP it would cut CS5. If it will cut this then that may eliminate any weirdness that may have happened during the trace.
-
Welcome from Idaho. My niece is Sarah Hokom, maybe you have heard of her. LOL I did a few vinyl masks for her last year.
-
I agree with the crew, double check the depth. You should barely even be able to tell there is a blade sticking out. I sometimes take a flash light and watch from the side at vinyl level as its cutting to be sure that the holder is just barely clearing the top of the vinyl.
Looking at the text you cut I would bet your off set if wrong, not sure what that is for the SC model. I would also double check that you are keeping the hold down rollers over the grit rollers on the drive shaft. The text looks really horrible and that is very suspect.
-
1
-
-
I am definitely going to be wanting to do some stone so I will look for some Silicon Carbide. Thanks Graniteguy, There are four different tips in the kit. I assume going to be using the largest with the 70-80 grit media? Do you screen your media before re-use? Can you even re-use it when you are cutting stone?
clhyer- In your opinion do I want to grab a hepa rated dust mask or will a typical particle mask work? I have a good shop vac that I will buy a new filter or and hook it to the cabinet. It's winter so I planned to do this in the garage but maybe I better think about braving the cold ad having a little more air movement around me. I don't want to die of silicosis! Also good tip on the air dryer. I have a pretty good compressor but no air dryer and I can see that would cause issues real quick. I think the HF box comes with a few plastic window protectors but I didn't see any replacement ones for sale in the store.
Got my new ce6000 working great just 1 question
in GraphTec Cutting Plotter Discussion
Posted
I don't use sign blazer but that rewind is a function controlled by the cut software so somewhere there will be an option to control it. I use SignCut Pro and it has about three options one being rewind another being advance by XXXX amount to cut off roll and the last basically leaving it where it finished.
edit: I just opened the copy of signblazer that I happen to have on my work comp and If you open the cut tab then the set-up tab my copy has a box that says advance after cut and gives an option box to tell it how far. That should advance to where you want it. Mine is .25" by default. Not sure if this is the same on all versions if SB