Leaderboard


Popular Content
Showing content with the highest reputation on 12/11/2017 in all areas
-
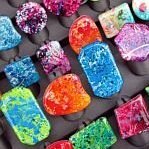
3 pointsI've been cutting since ~2014-2015 and have done quite a lot with a little. Have contemplated going full time but that requires a lot of time and a better cutter (currently have an MH Refine 721 that I bought used). Anyway here's a few that I've done! I've got more, just can't find them on here.
-
1 pointWhile this is not actually related to the issue you are having, be aware that your blade holder is NOT correctly seated within the carriage arm. That barrel of the blade holder needs to be lower down, so it rests against the retainer ring -- there shouldn't be any gap like that, it needs to be flush against the bracket. What sometimes happens is the blade holder itself slips up as the machine is working (from the down contact force). It so happens that you cannot put too much pressure onto the retainer arm (over-tightening the knurled locking knob) because it will literally crack that arm. My solution to this was adding a bit of masking tape onto the barrel of the holder which provides friction/traction and keeps it from slipping back up. As to your original problem, I'm also going along with dakota and darcshadow ---- Static (which is more of a problem on dry winter days). Just put a dryer sheet into the vinyl cardboard tube.
-
1 pointcouple of things - the diagonal line is usually one of 3 things - cut software not being activated will cause it to do that, static causes such issues and exceeding the very limited memory in a MH also causes such issues --- part of the reason the new sc2 came out with more memory. lastly the original mh cutters seemed to be less troublesome than the later ones but that particular plotter looks like it was rode hard and put up wet . . . might be time to put it out to pasture
-
1 pointMost other vinyl cutters are Mac compatible.. But this one is a bottom of the barrel vinyl cutter and not Mac compatible. The value cutters have a cheap USB chip set. They are not TRUE USB, While some people have no problems using the USB cable that came with the cutter. others have nothing but trouble and we highly suggest that you purchase a Tripplite Keyspan Adapter. Shown here. Purchase best price. https://www.ebay.com/itm/Tripp-Lite-Keyspan-High-Speed-USB-to-Serial-Adapter-PC-Mac-USA-19HS-1-Pack/222076446870?hash=item33b4c9a896:g:hp8AAOSwiiRZgphX
-
1 pointOh ok thnx . I think it should just be out in plain sight .Since its a very important key note. but i guess it will do lol.
-
1 pointbeen stickied for years under instructional contributions section of the forum - 4th topic down http://forum.uscutter.com/index.php?/forum/39-instructional-contributions/
-
1 pointI think there should be a Main Tab on the main forum page that says -" Start Here"---- How to set your blade depth before you start cutting anything. That way when a new person shows up it will be Right there on top...Some people may not even know how to describe what it is called etc and they end up having to ask the Million Dollar repeated question lol..
-
1 pointJust start clicking on icons and open the menus. That's the best way to learn software. You can't BREAK it. Here FWIW, are my ABC's and 123's A] Artwork & Graphics --- No raster art for cutting, it has to be vectorized first (VinylMaster has a good conversion engine, see tutorial in the Training link provided) Also, VM contains some built-in cuttable clipart in the CUT basic version, and more items in the upgraded LTR and PRO. Just click on the teddy bear. B] Begin Cutting --- check the Separate By Color box, enabling you to send multi-color designs to the cutter one element at a time. Remember, since YOU control what color vinyl is loaded into the machine, it doesn't really matter what color you place on your workspace screen. In other words, you can use Purple and Yellow when designing, but Blue and Gold vinyl when cutting! C] Circles & Squares --- One trick to making a more interesting sign is the use of Reverse. Put white text inside a black square or circle or oval, and after it's cut (select both colors), weed OUT the lettering. 1] Learn your Fonts. Spend some time just scrolling through them and just keep a mental picture. Serif and Sans-Serif are the two main classifications. Times Roman is serif; Helvetica is sans-serif. 2] Node Editing. Daunting at first, but essential when working with vector graphics. 3] Kerning and Leading. (adjustment of spacing between Letters, and changing the distance between Lines of text)
-
1 pointFor the record, this is a font that uses "Small Caps" -- a nice effect.
-
1 pointOPTIAmericanGothic (Medium) (Free) or Copperplate Thank you "Find My Font" Sue2
-
1 pointI heard something go bump in the night, walked downstairs this morning and found this. Merry Christmas to me!!
-
1 pointThanks for the help folks - another project underway now.